
Turning on Lopux-Internet on Android
Beside the ordinary internet we run one of our own, with names like mysite.lopux that no public DNS knows. This guide turns it on in the Android app.
It is off by default, and off means nothing is created and nothing is running. If you only want the VPN, you can close this page.
The phone works differently from the computer, and the difference is the whole reason this guide is long. On a computer the app installs its certificate for you. Android does not let any app do that — it is the one decision the system reserves for the person holding the phone. So here the app creates the certificate, hands you the file, and you install it yourself in Android's settings. The app cannot even see whether you did: you tell it, with a button.
The screenshots are a stock Android 16 with the English interface. Phone makers move and rename these system screens — Samsung, Xiaomi and Huawei all differ — so if a name below does not match yours, search your settings for certificate.
1. Connect the VPN first
Lopux-Internet resolves names and checks keys through the tunnel. Off the VPN there is nothing for it to do, and its button is dead.
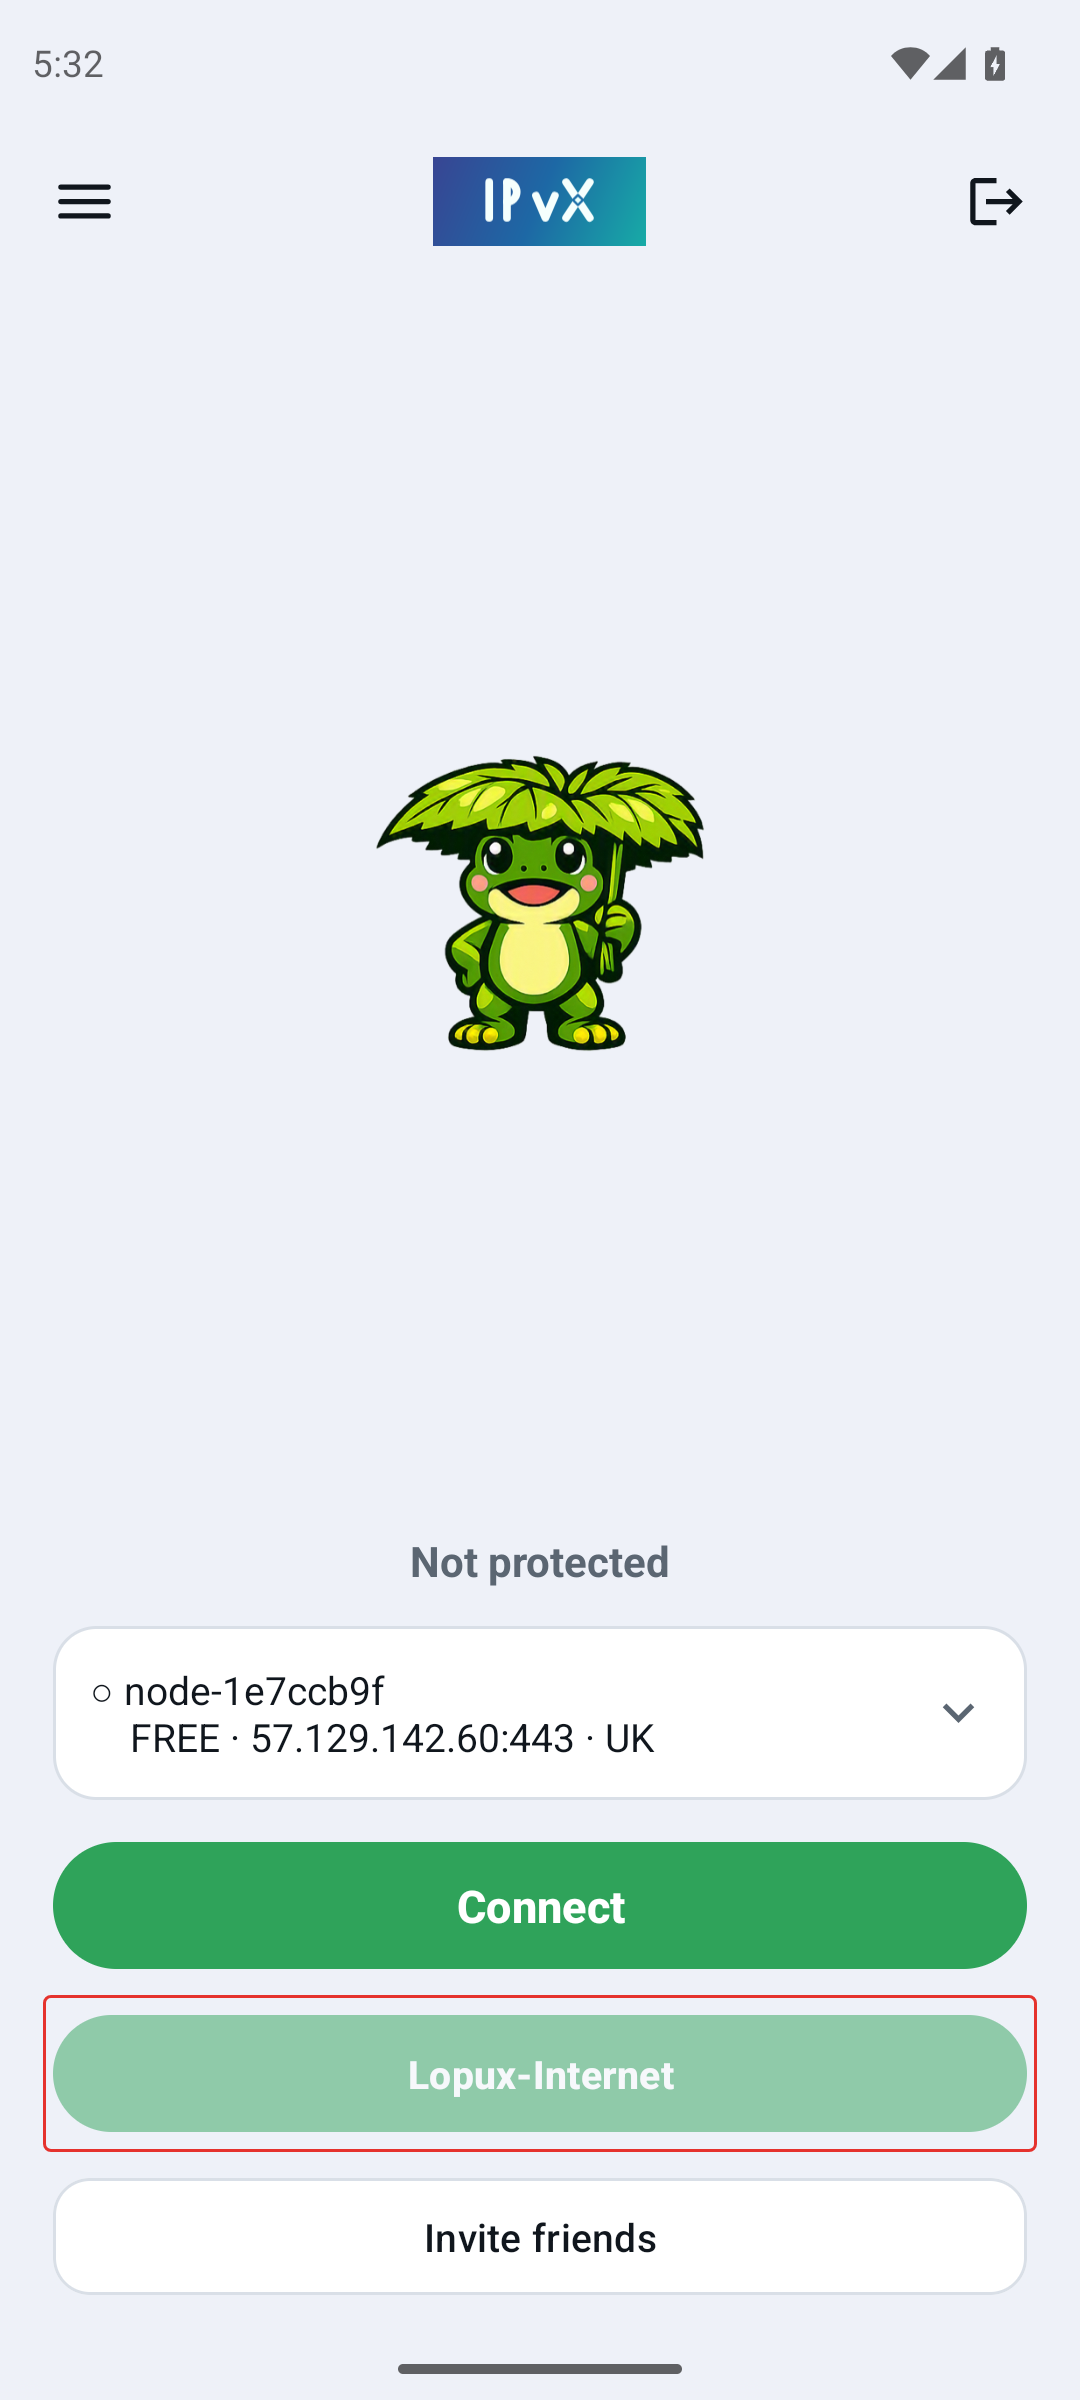
Connect as usual. The button comes alive.
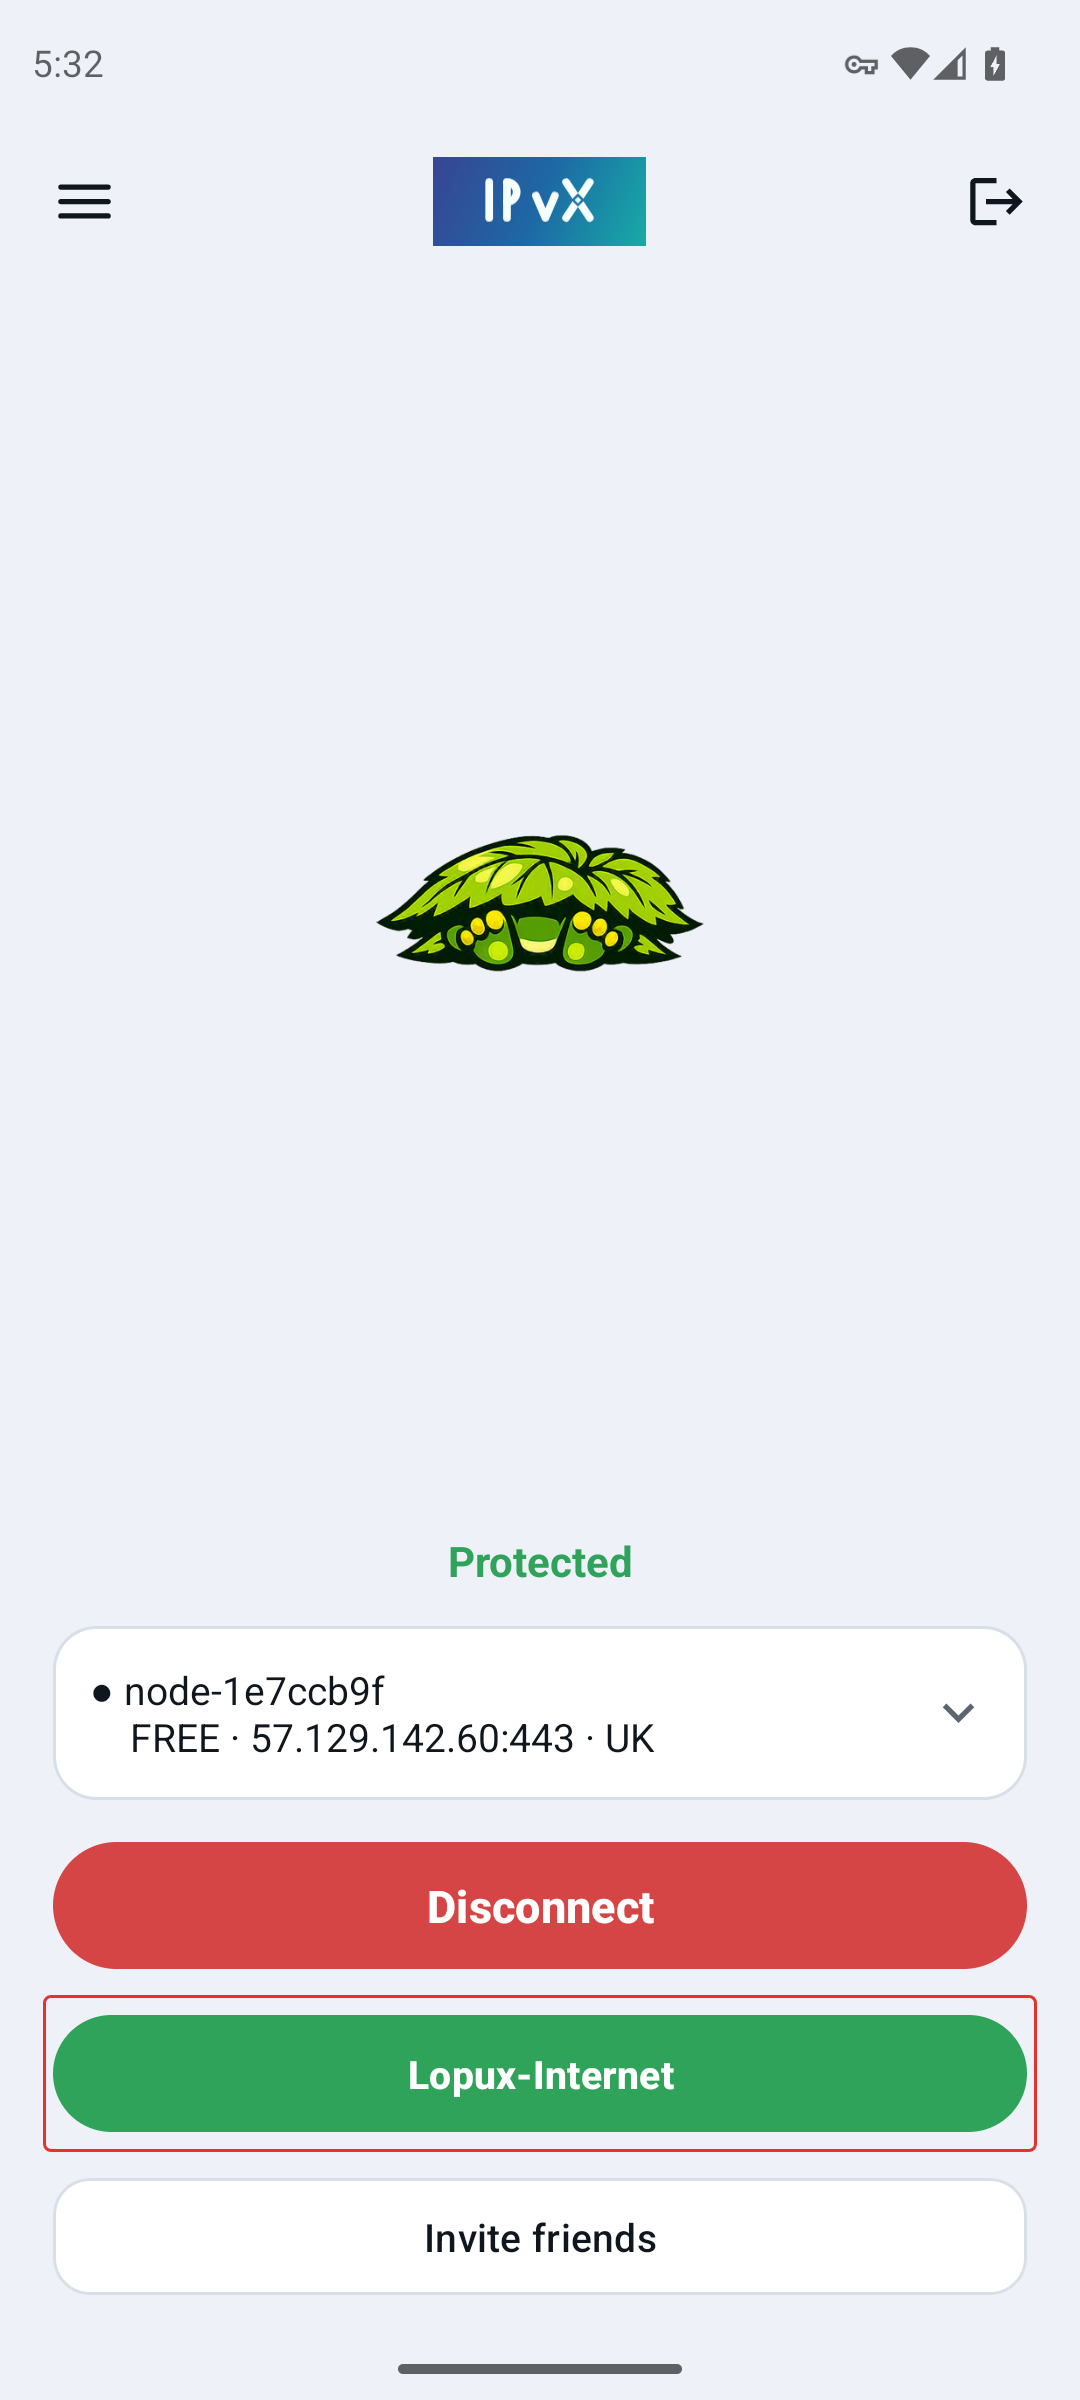
2. What the app is asking for
Press it. The first time it takes you to the certificate screen rather than turning anything on, because there is a decision to make first.
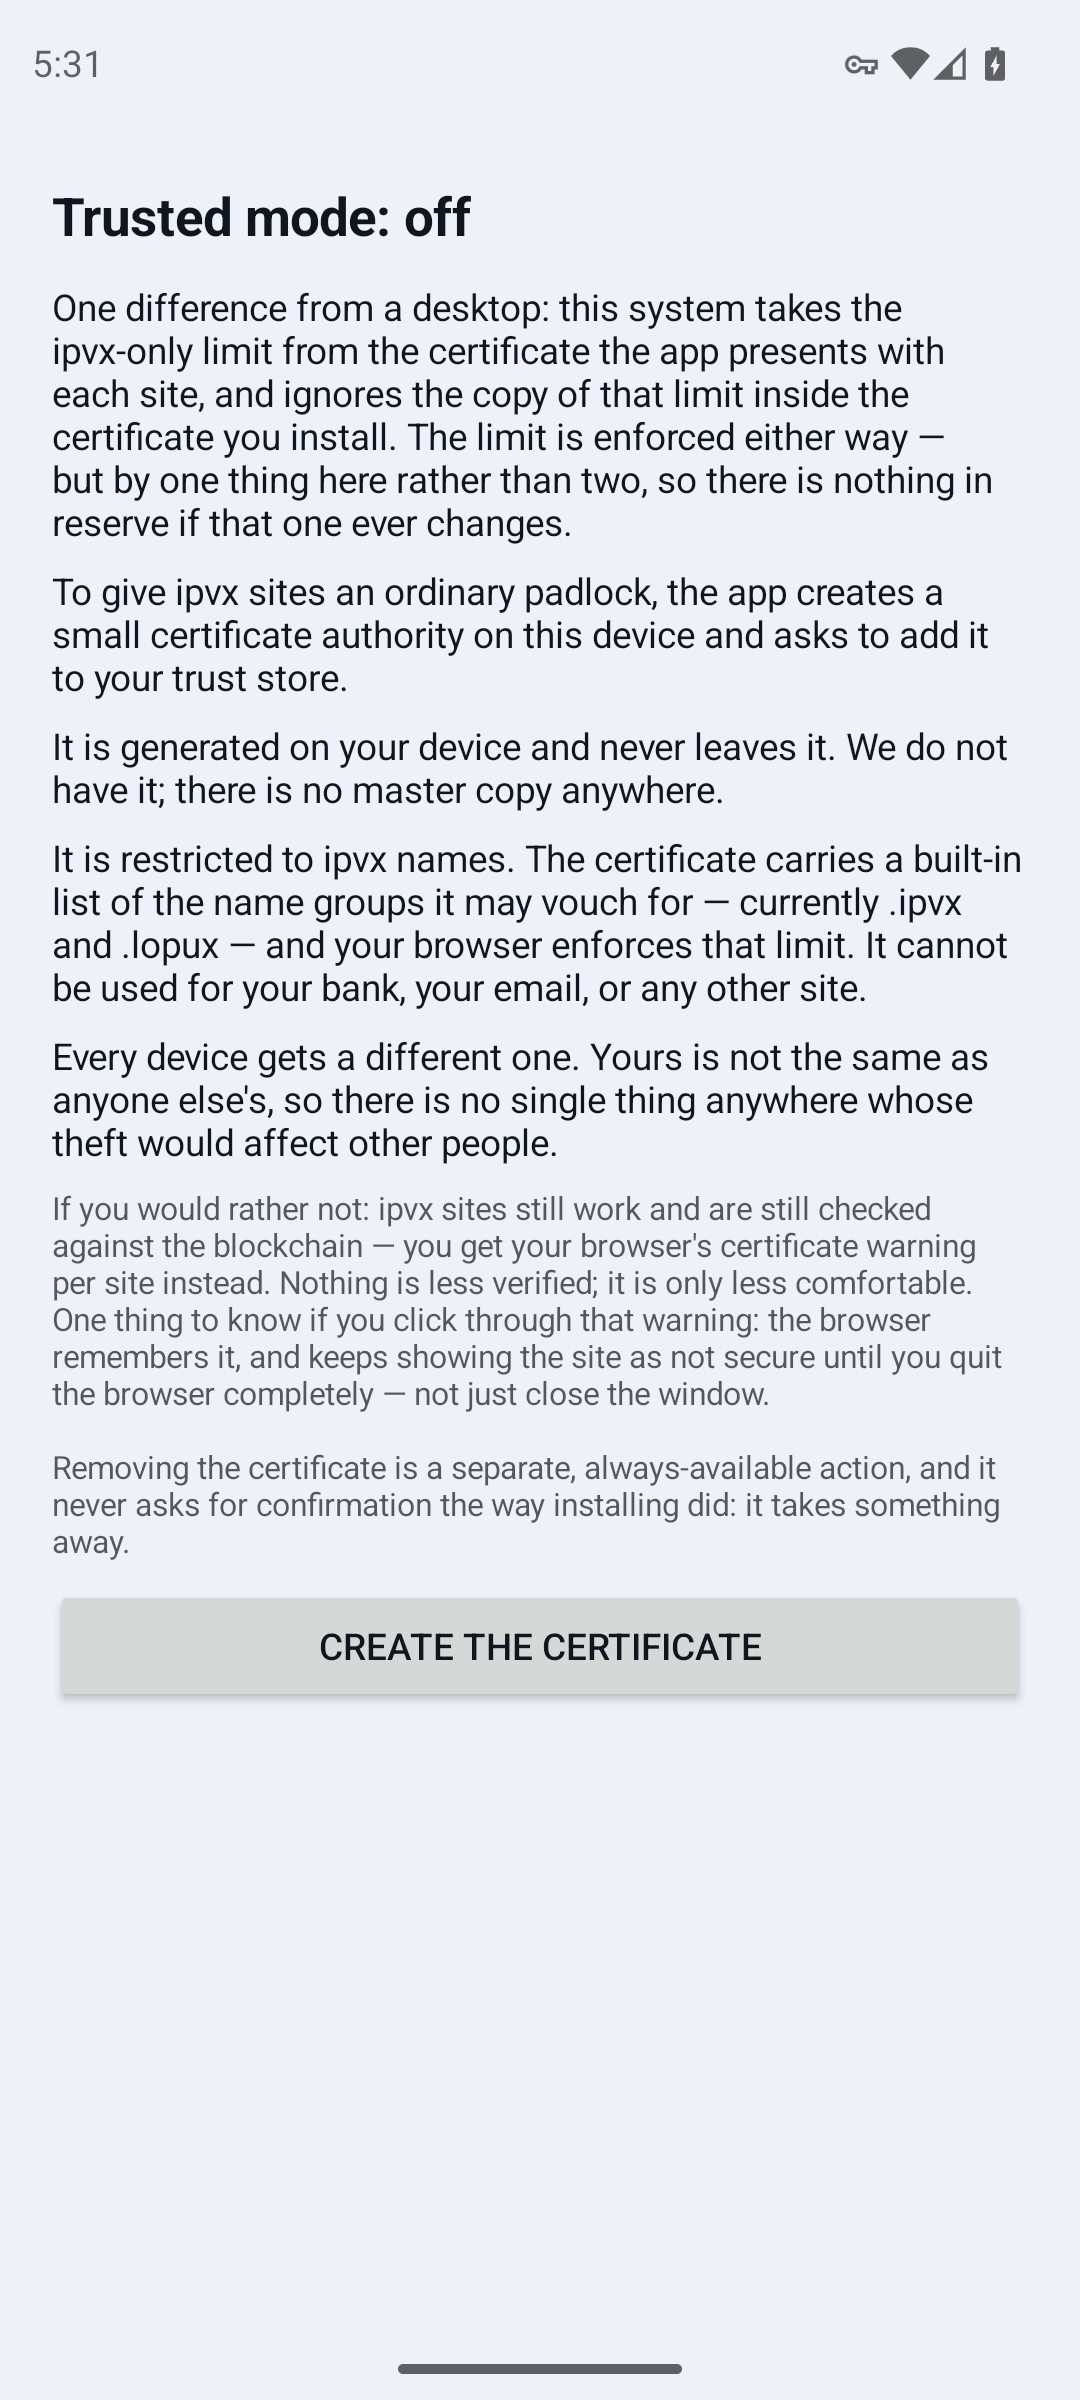
The short version:
- a small certificate authority is created on your phone. Your browser will not show an ordinary padlock for a name it has never heard of, and no public authority may issue for these names — so the app becomes one, locally;
- it is generated on your phone and never leaves it. We do not have it and there is no master copy. Seizing every machine we own would not produce a certificate your phone accepts;
- it is restricted to ipvx names — currently
.ipvxand.lopux. It cannot be used for your bank or your email; - every device gets a different one, so there is no single thing anywhere whose theft would affect anyone else.
Two limits that are specific to the phone, and the screen states both before you agree:
- it works in browsers, and not inside other apps. Since Android 7 an app trusts only the authorities that came with the system unless its own developer opted in, so a certificate you add by hand reaches your browser and stops there;
- the ipvx-only limit is enforced by one thing here rather than two. Android takes that limit from the certificate the app presents with each site and ignores the copy inside the certificate you install. The limit still holds — but there is nothing in reserve behind it.
And what declining costs: ipvx sites still work and are still checked against the blockchain. You get your browser's certificate warning per site instead. Nothing is less verified; it is only less comfortable.
3. Create it, and save the file
Press Create the certificate. It is made on the spot, and the screen changes to show what you now have: the state line reads certificate created — not imported yet, and under it the fingerprint — this phone's own, and the thing you will compare in a moment.
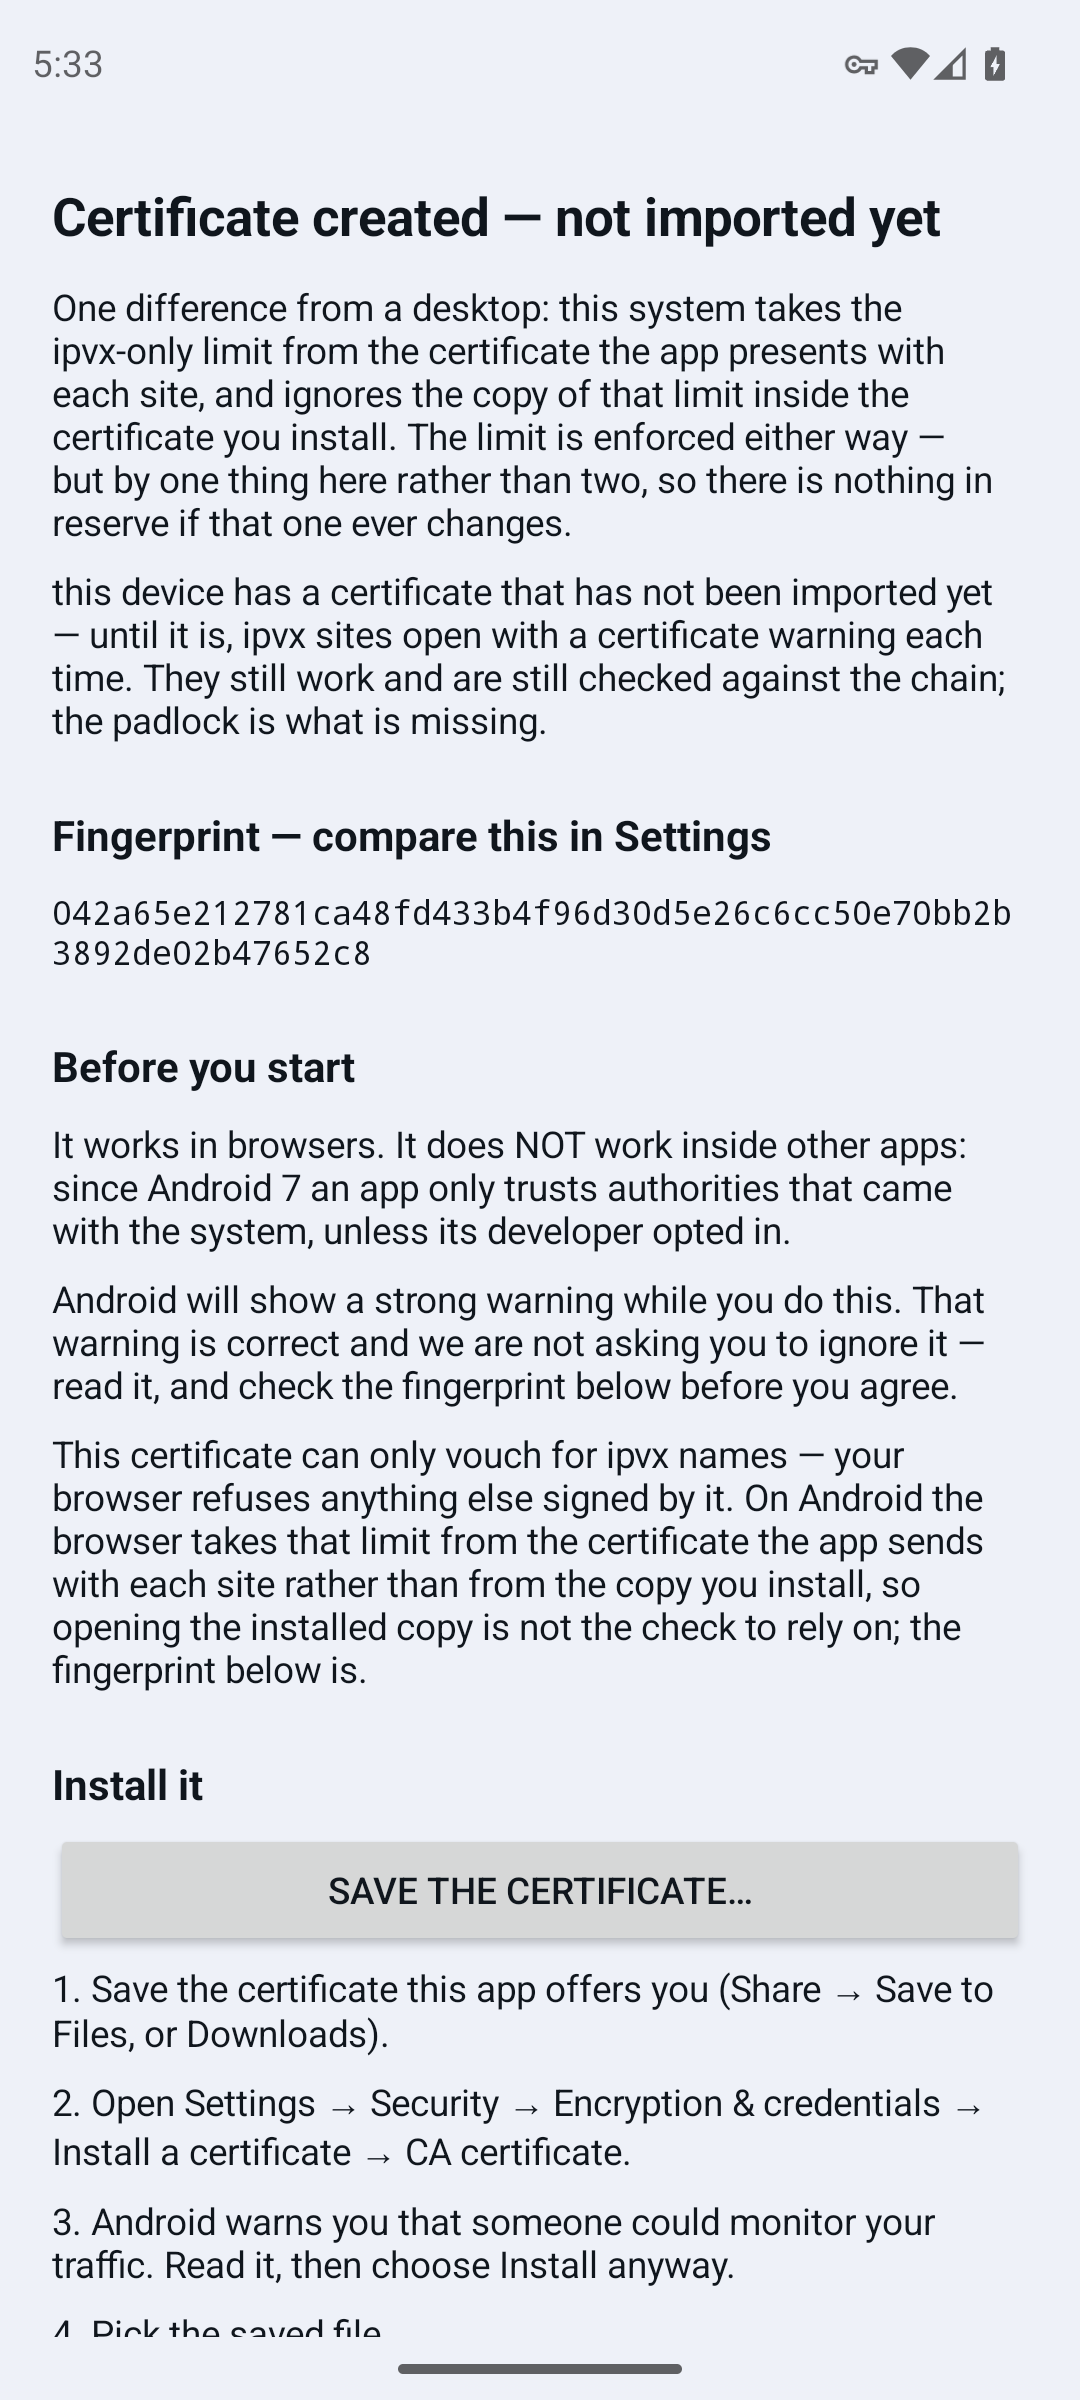
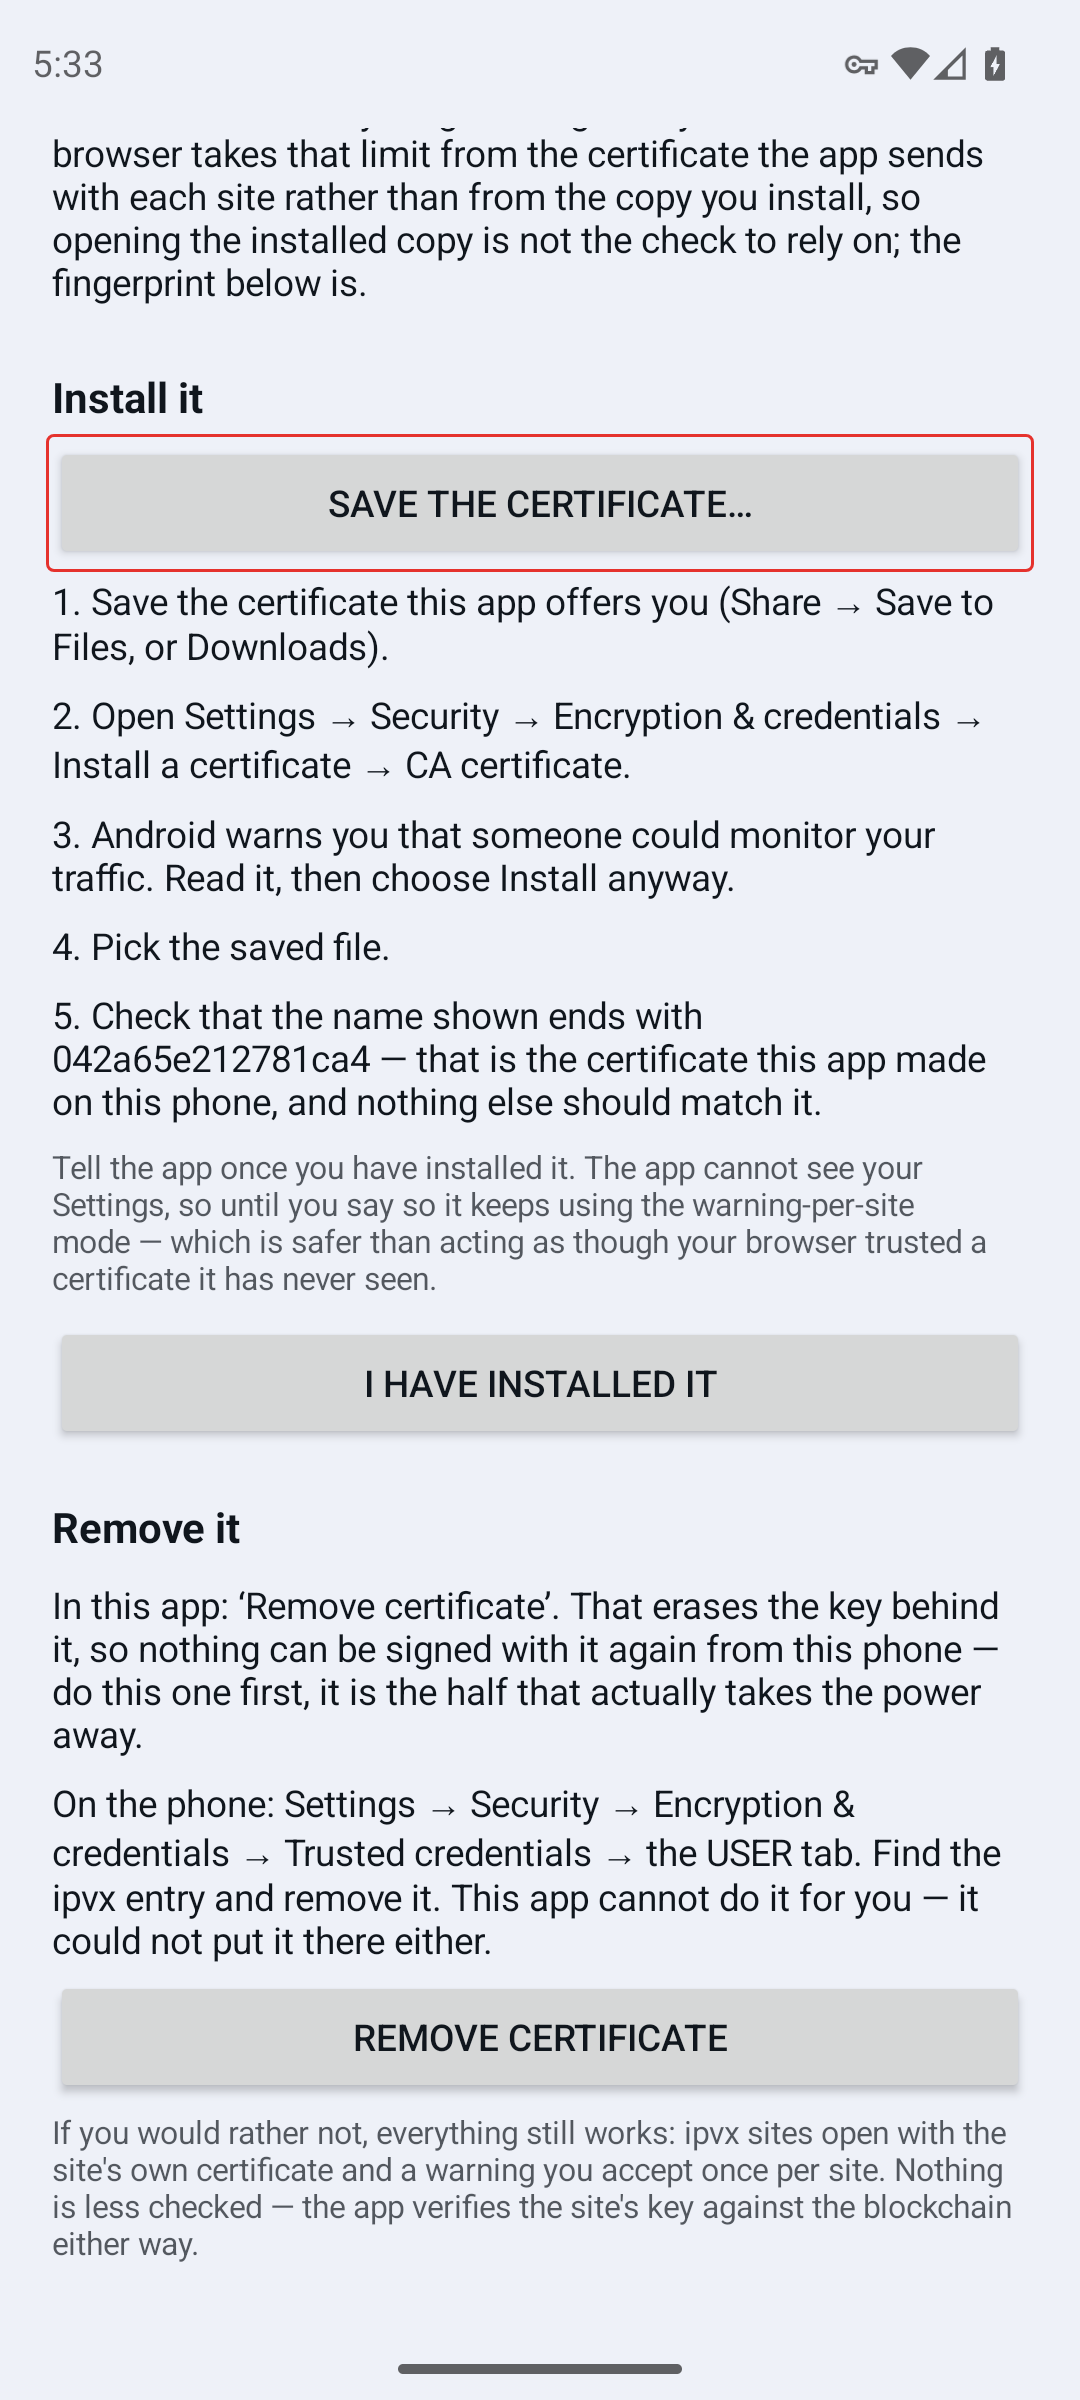
Press Save the certificate… and save it. The suggested name is ipvx-root.crt and Downloads is a fine place for it.
4. Install it in Android's settings
Leave the app and open Settings → Security & privacy → More security & privacy → Encryption & credentials. (The app's own steps say Settings → Security; on Android 16 there is one more level in between.)
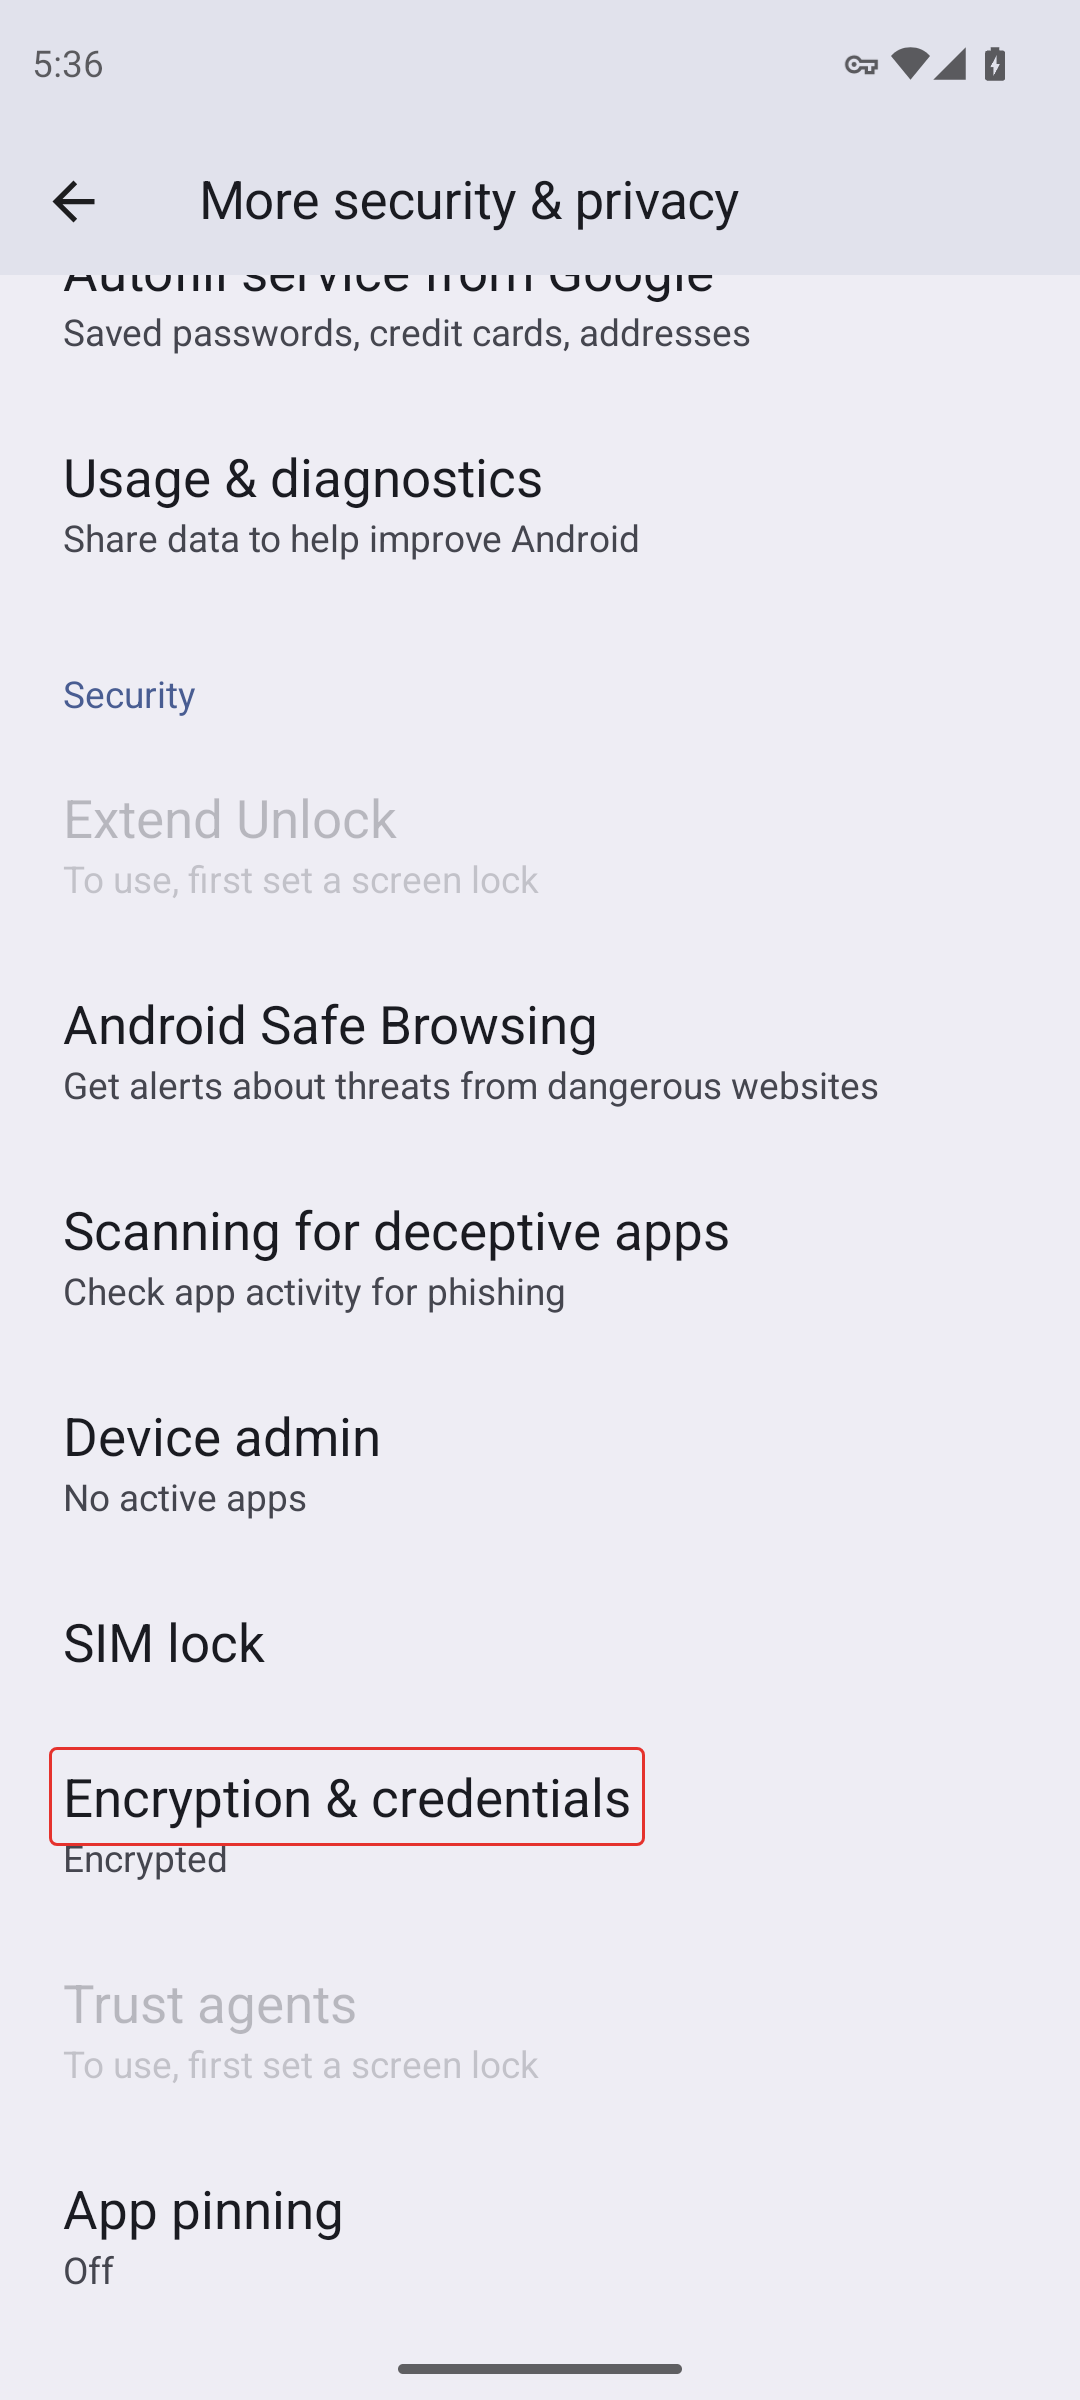
Choose Install a certificate…
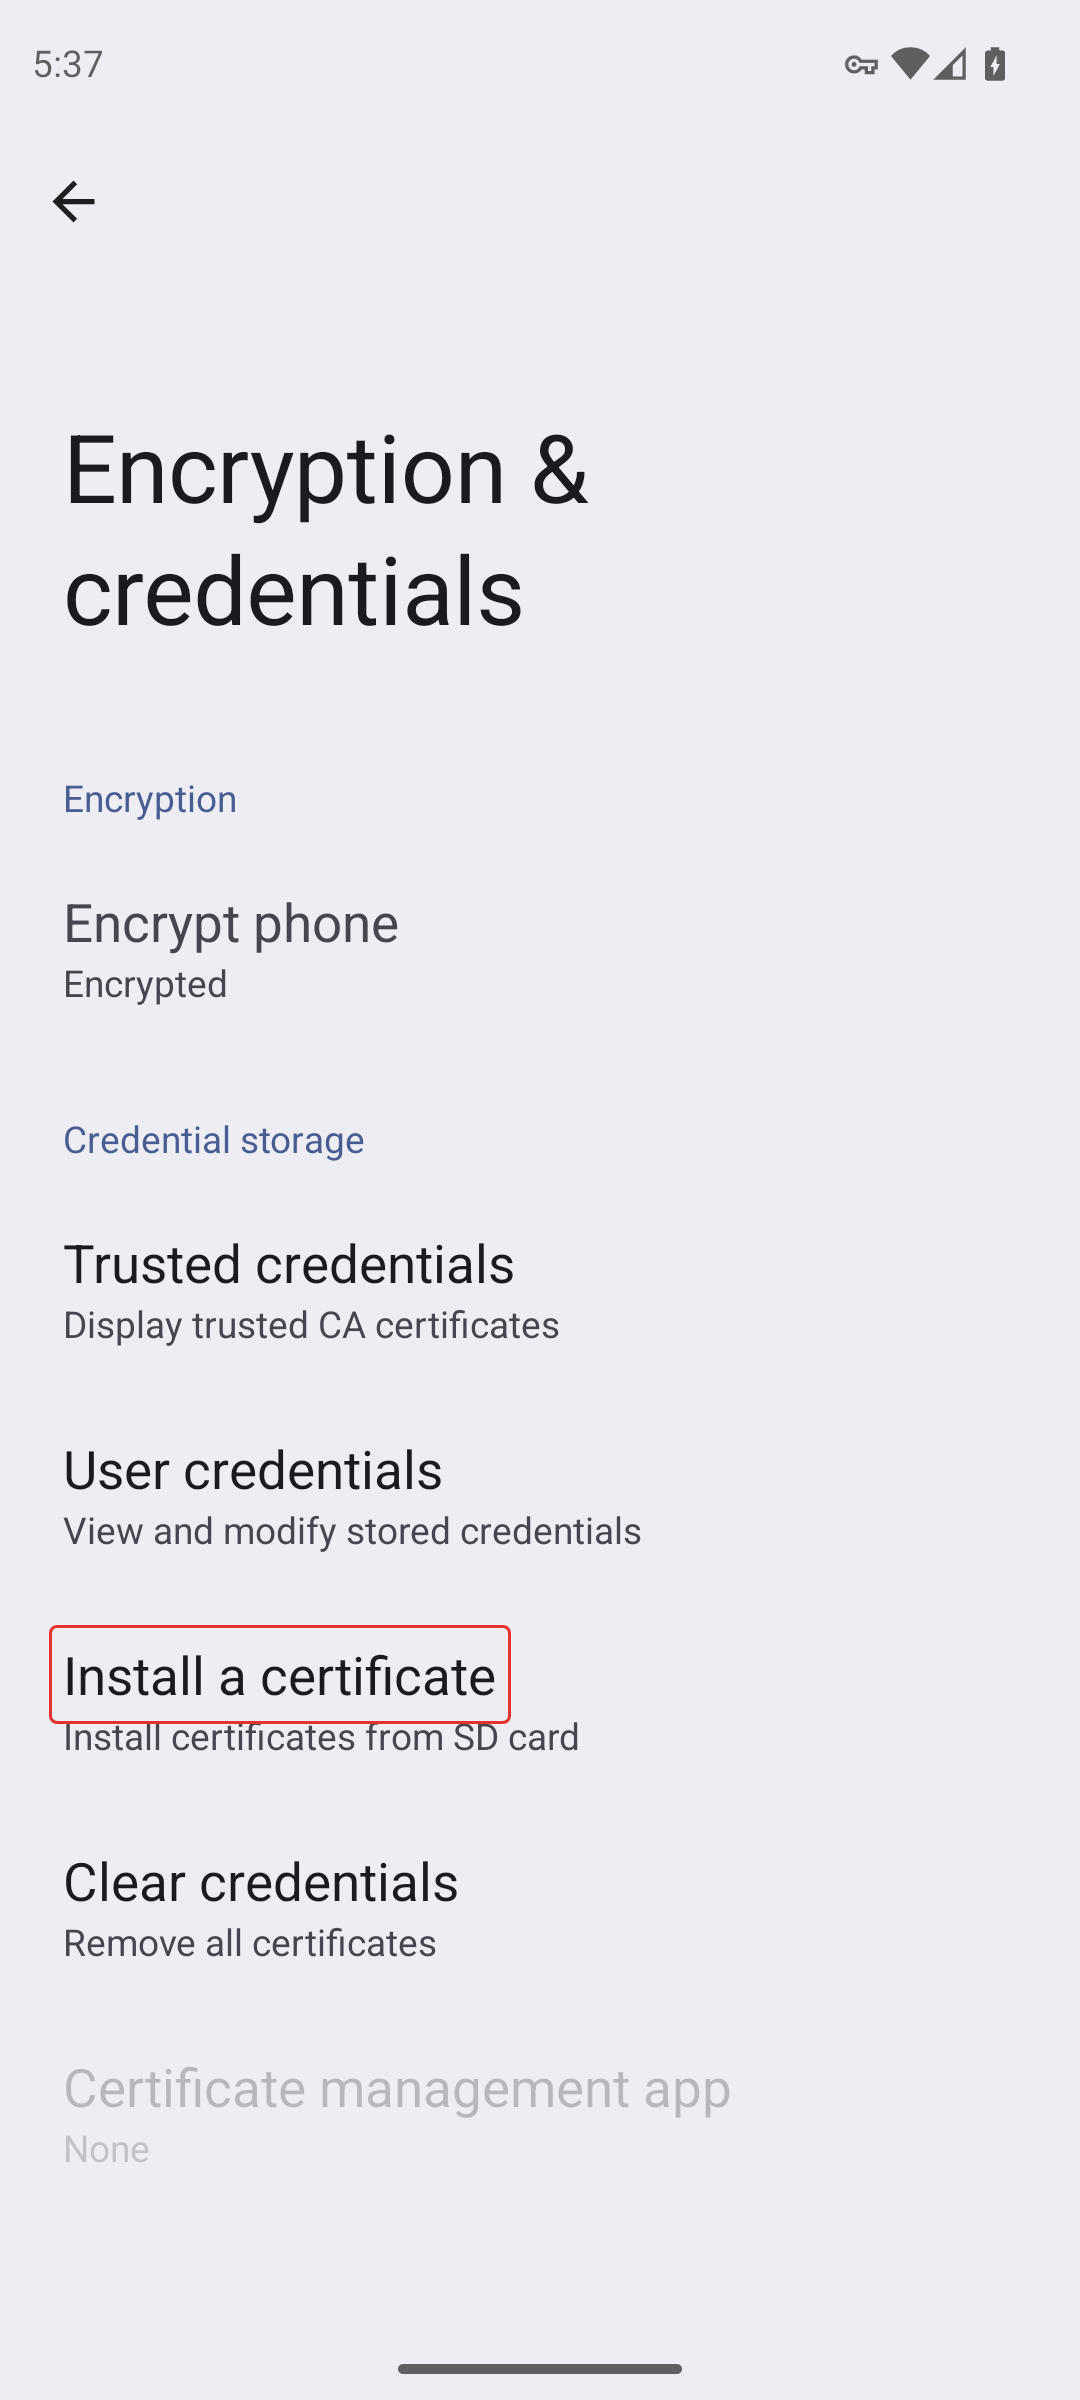
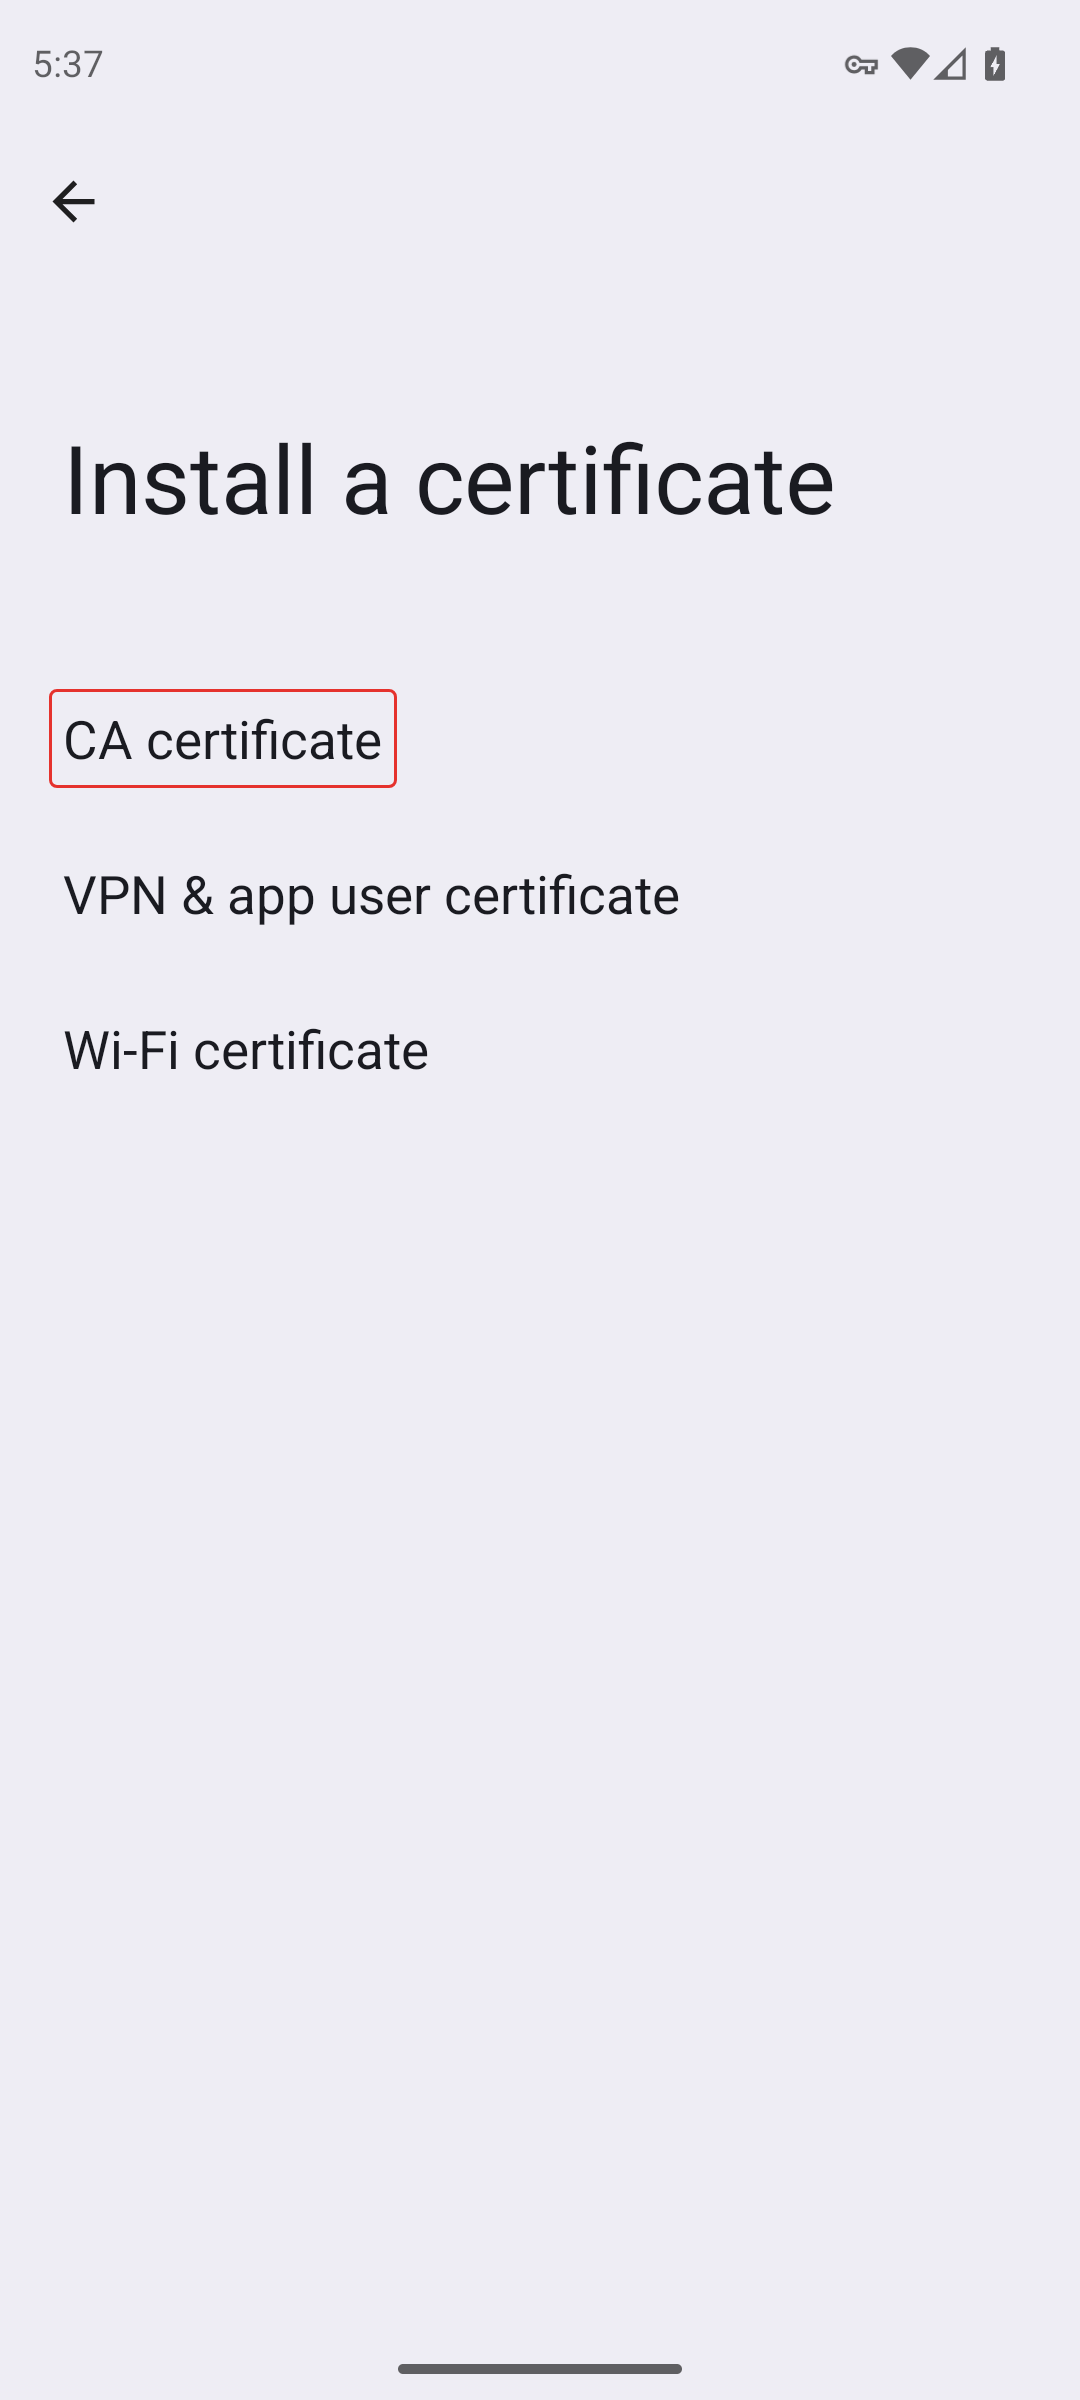
…and then CA certificate. The other two entries are for other purposes and will not do.
Android now shows you a strong warning, and it is correct. A certificate authority added by hand can vouch for sites, and one from a source that does not deserve it is exactly how traffic gets read. We are not asking you to wave it away: read it, and check the fingerprint before you agree.
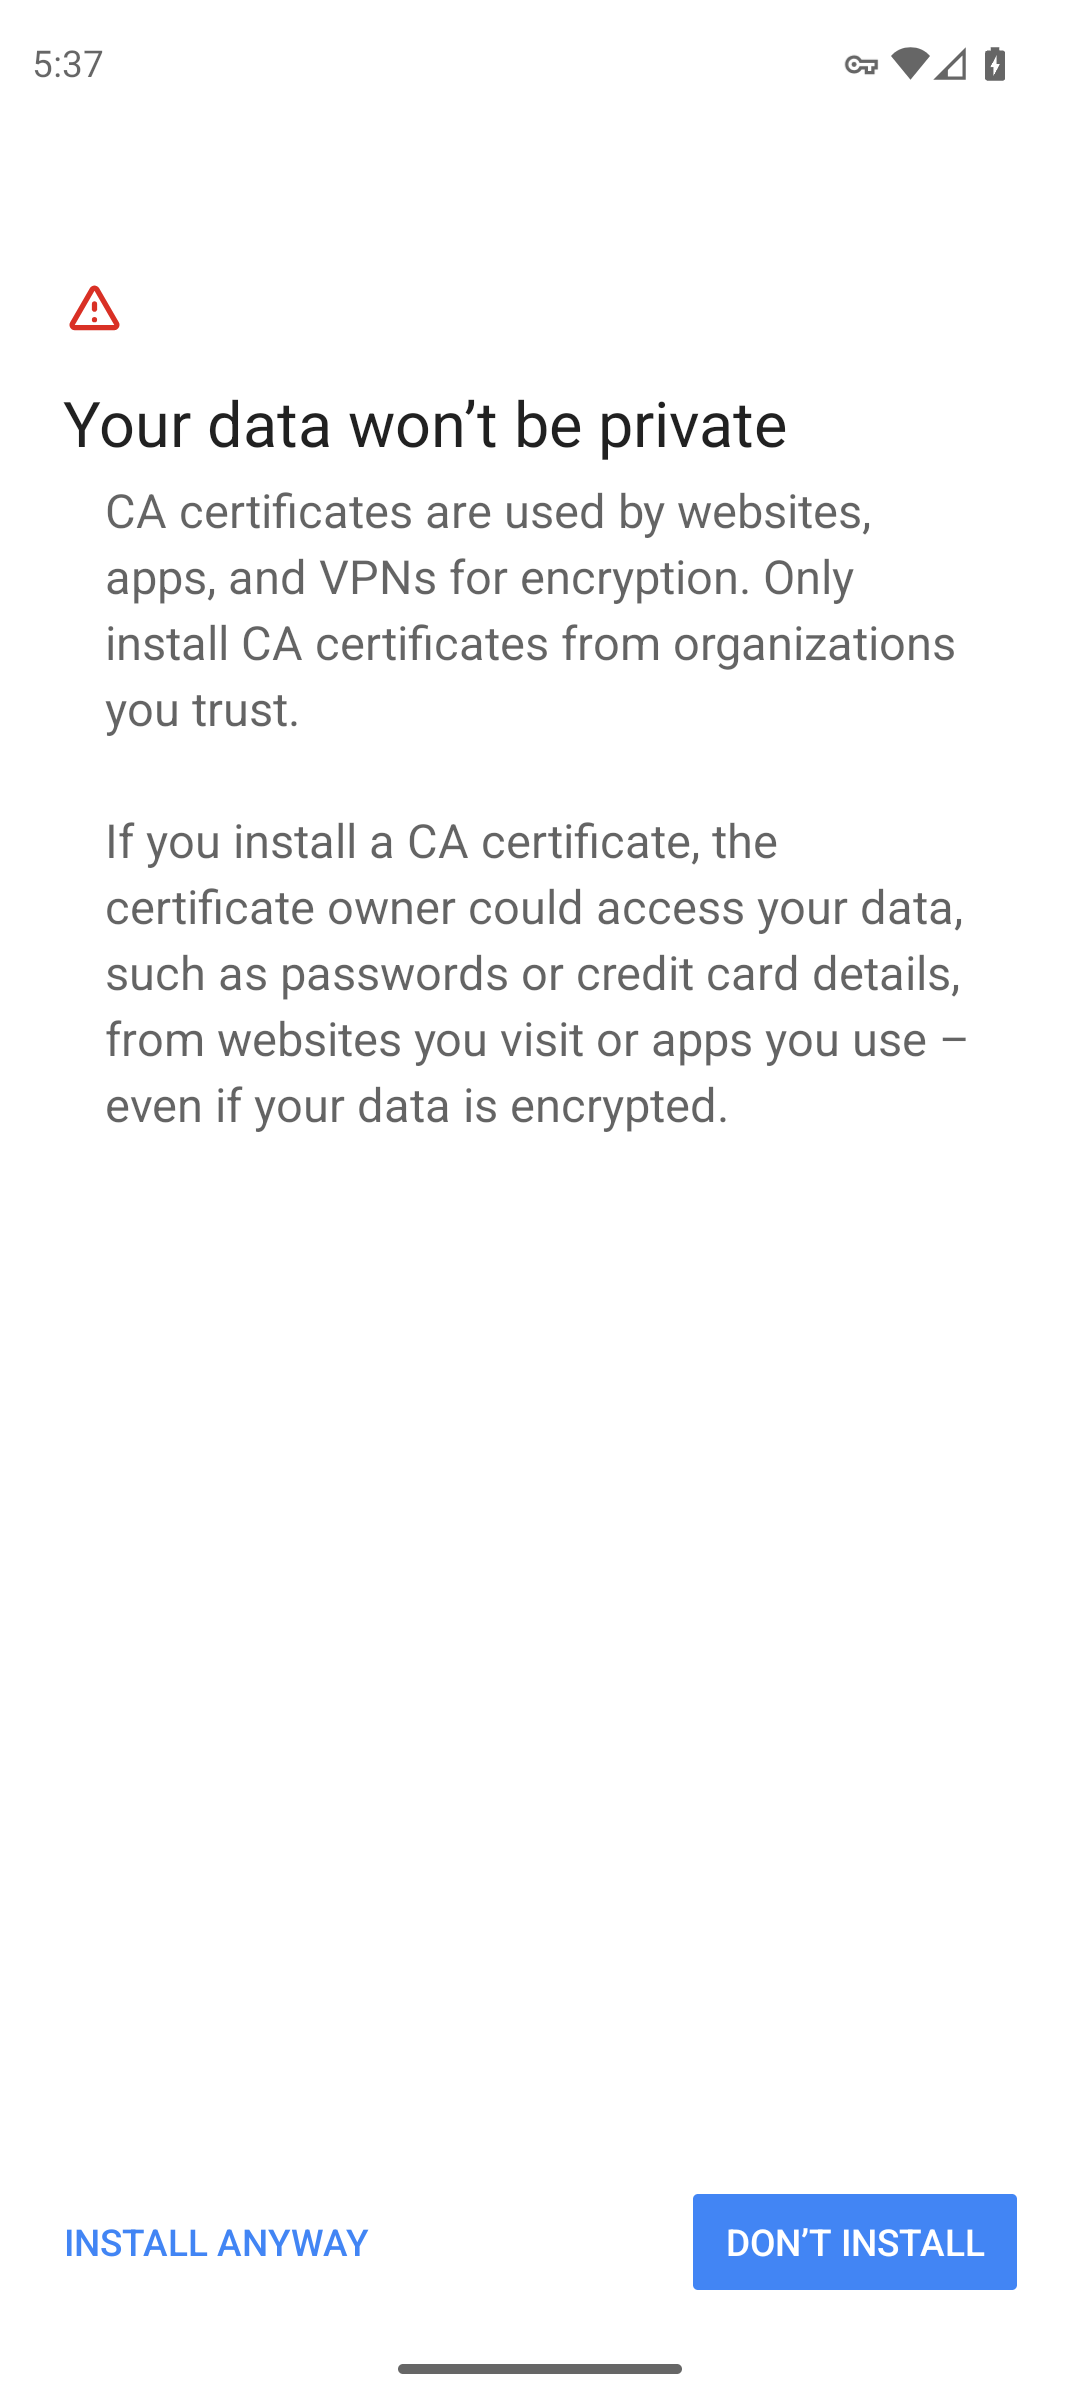
Press Install anyway and pick the file you saved.
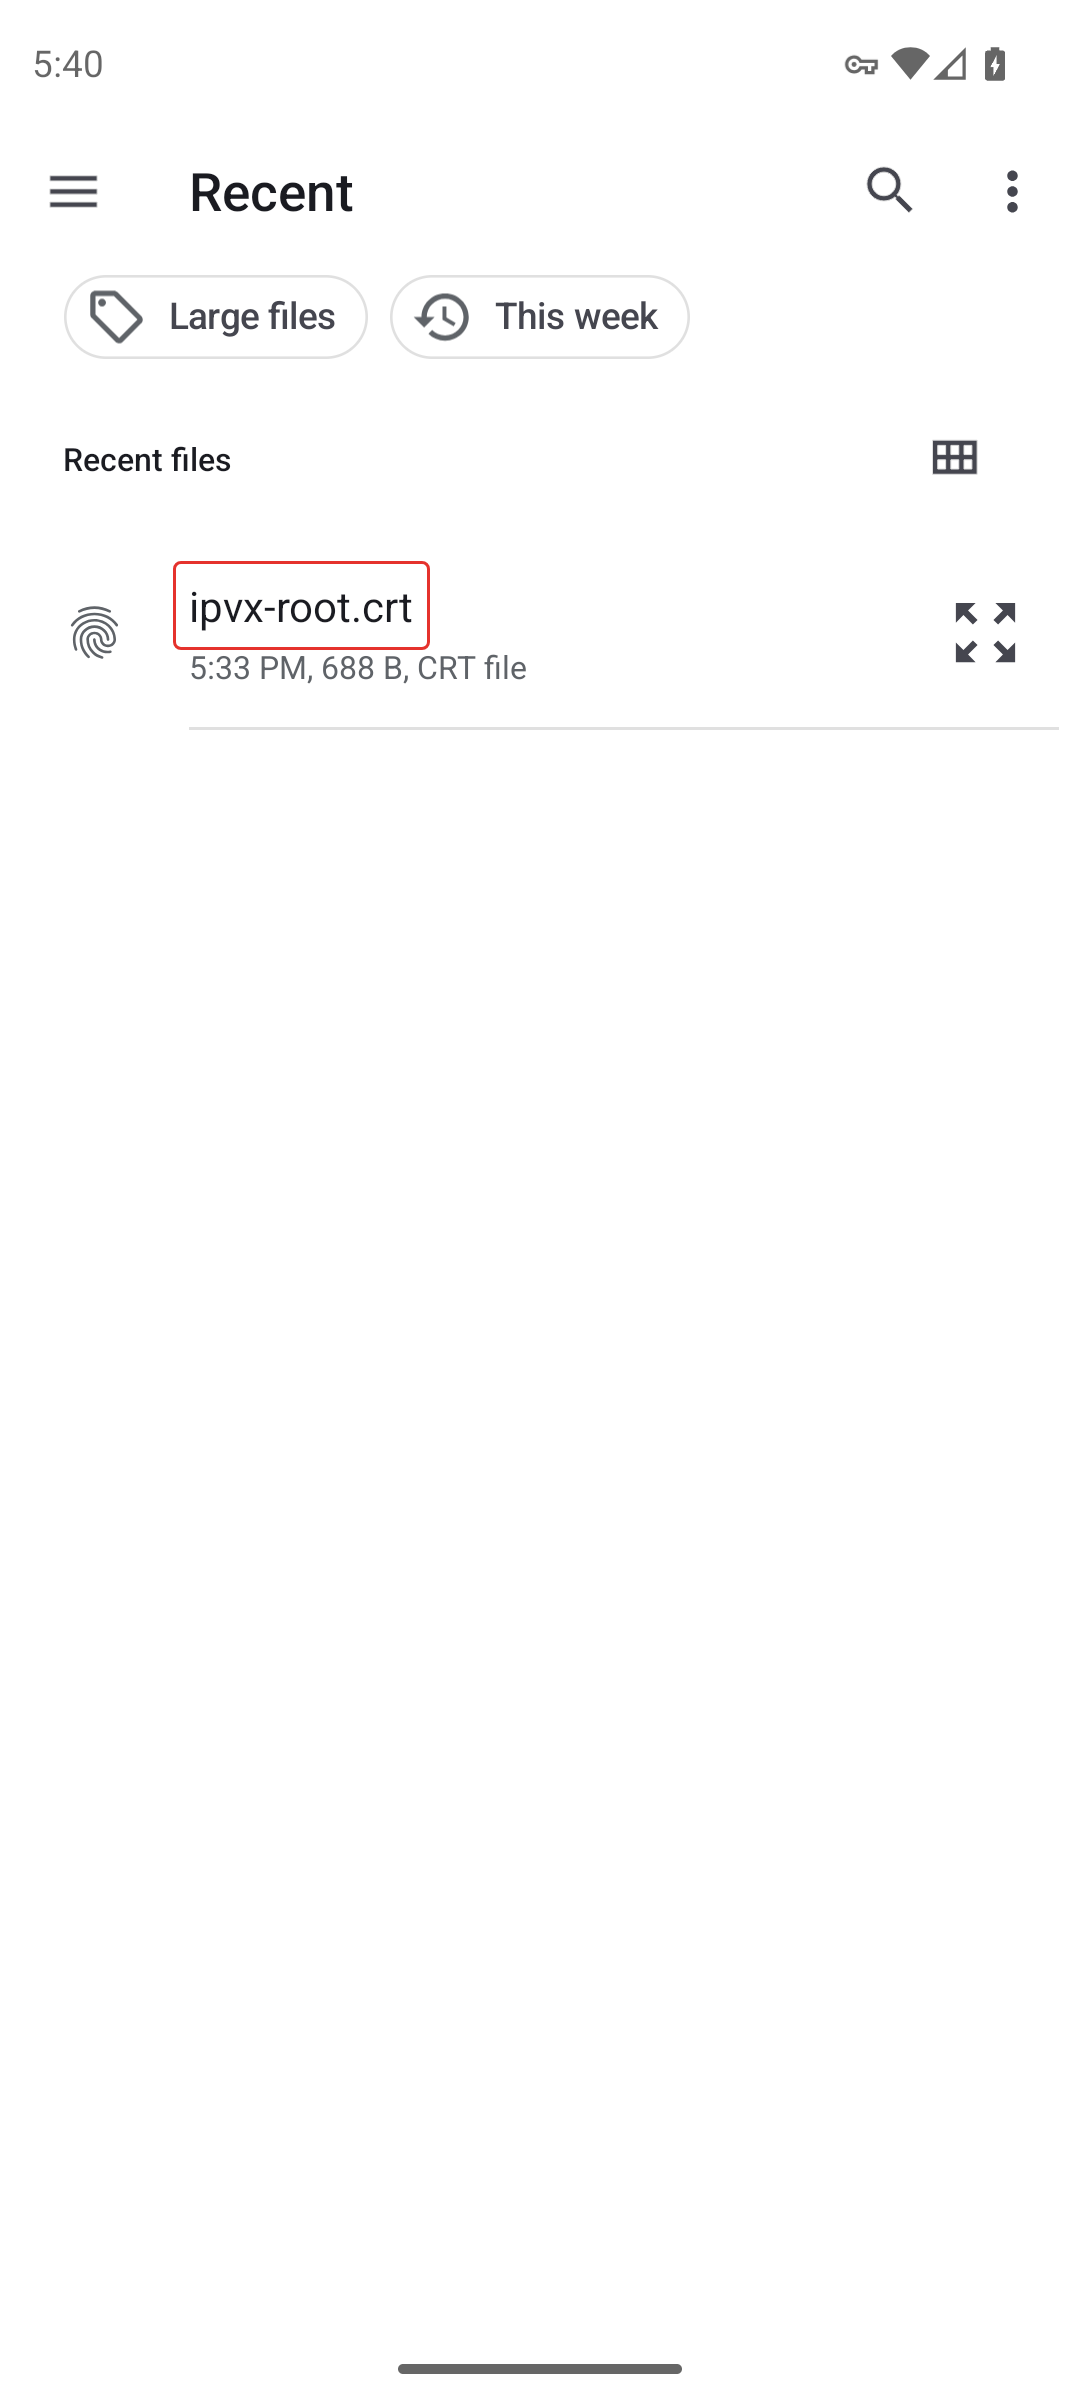
This is the step that matters. The name Android shows for the file must be the one the app told you to expect — the app's step 5 names the exact fingerprint, and nothing else should match it. If it does not match, stop: you are installing something other than what your app made.
5. Check that it landed
In Settings → Security & privacy → More security & privacy → Encryption & credentials → Trusted credentials, the User tab lists what you have added by hand. ipvx local root should be there, alone unless you have added others.
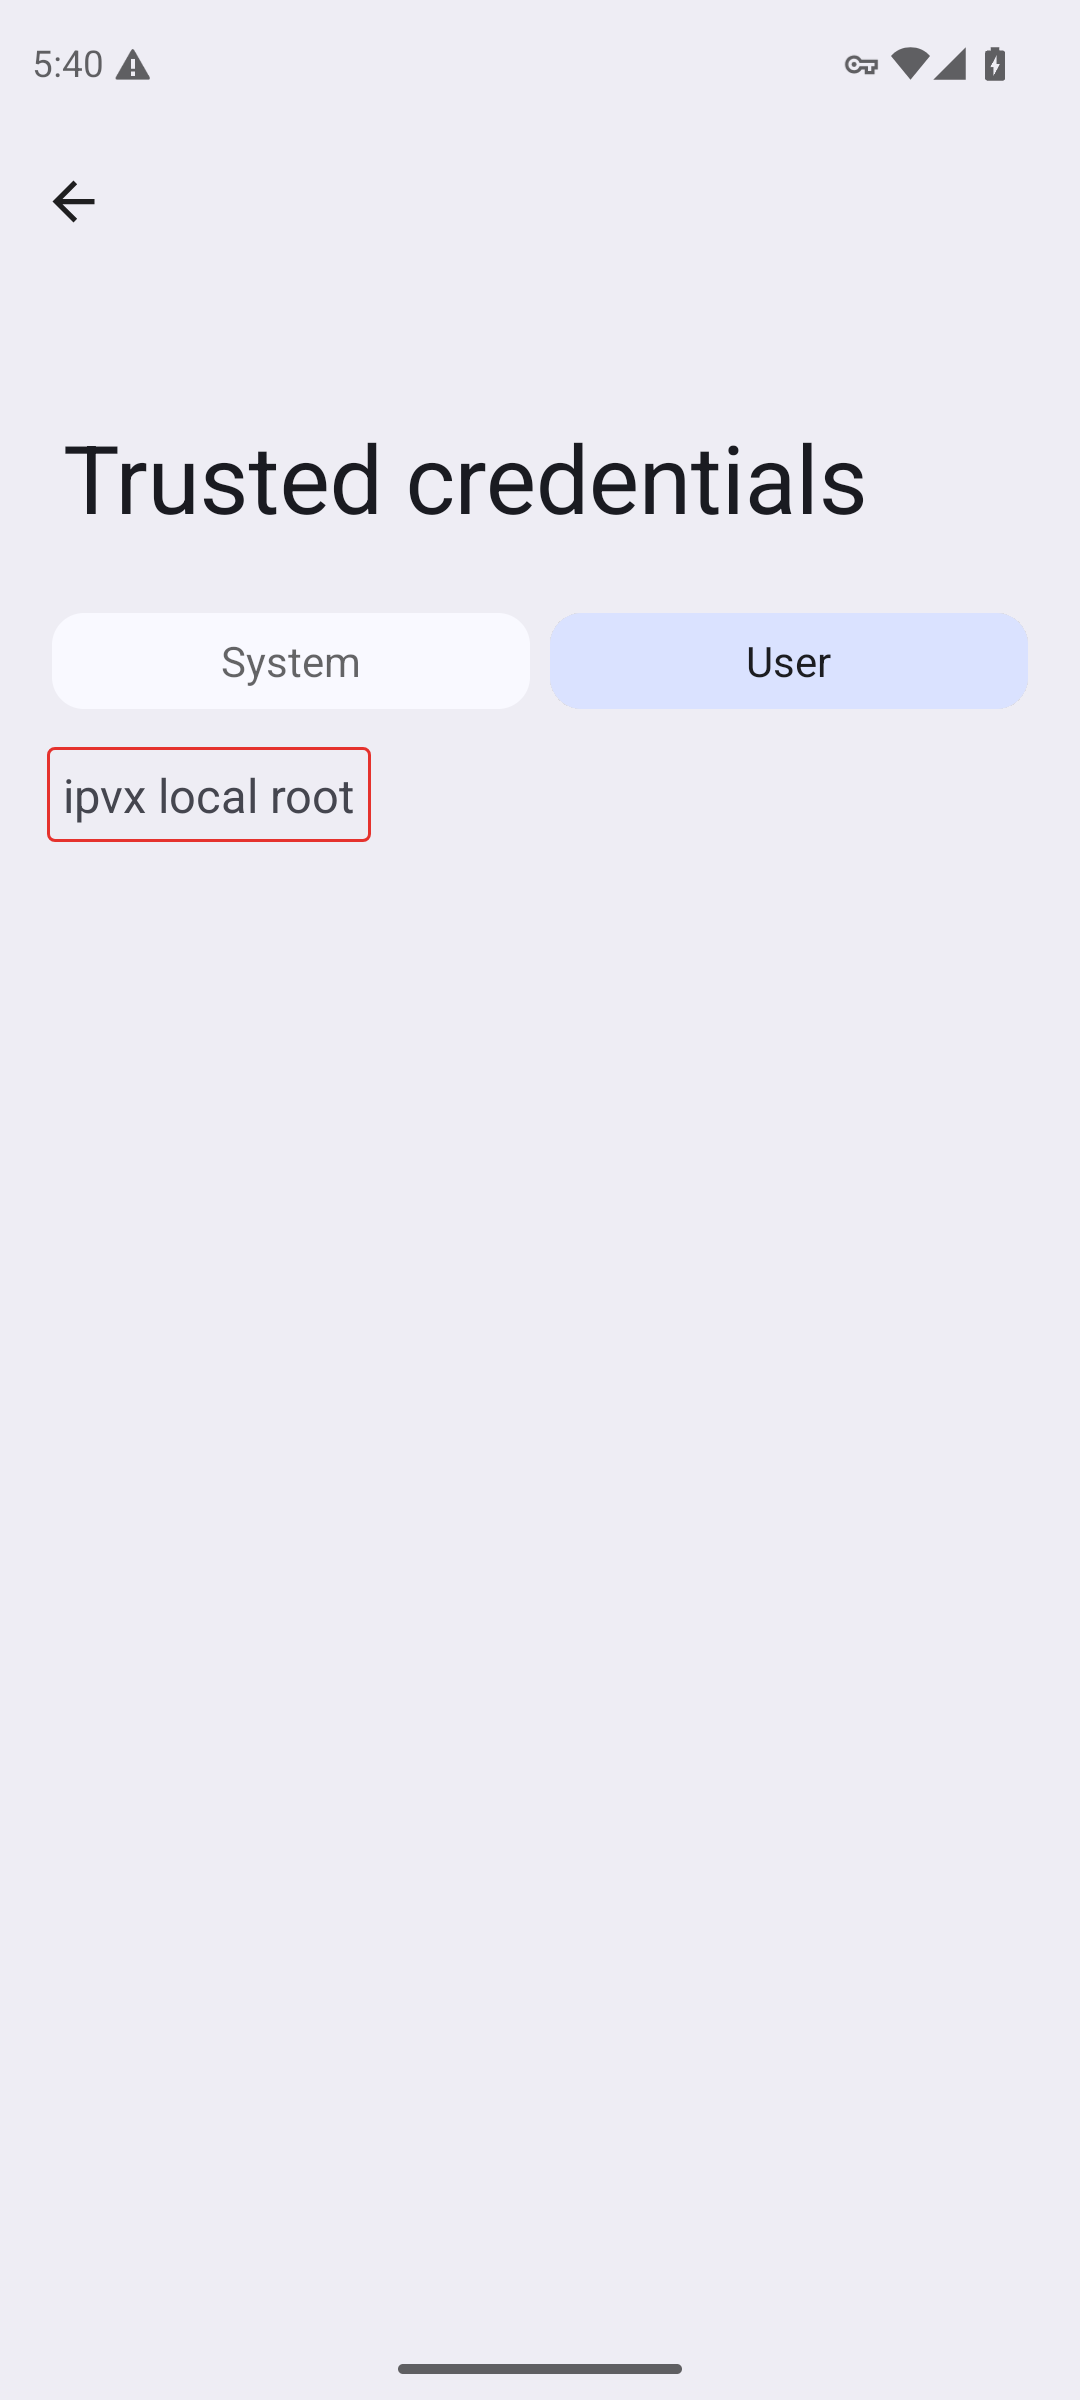
This is also where you will remove it later — see section 8.
6. Tell the app
The app cannot read your settings, so until you say so it keeps using the warning-per-site mode — which is safer than acting as though your browser trusted a certificate it has never seen.
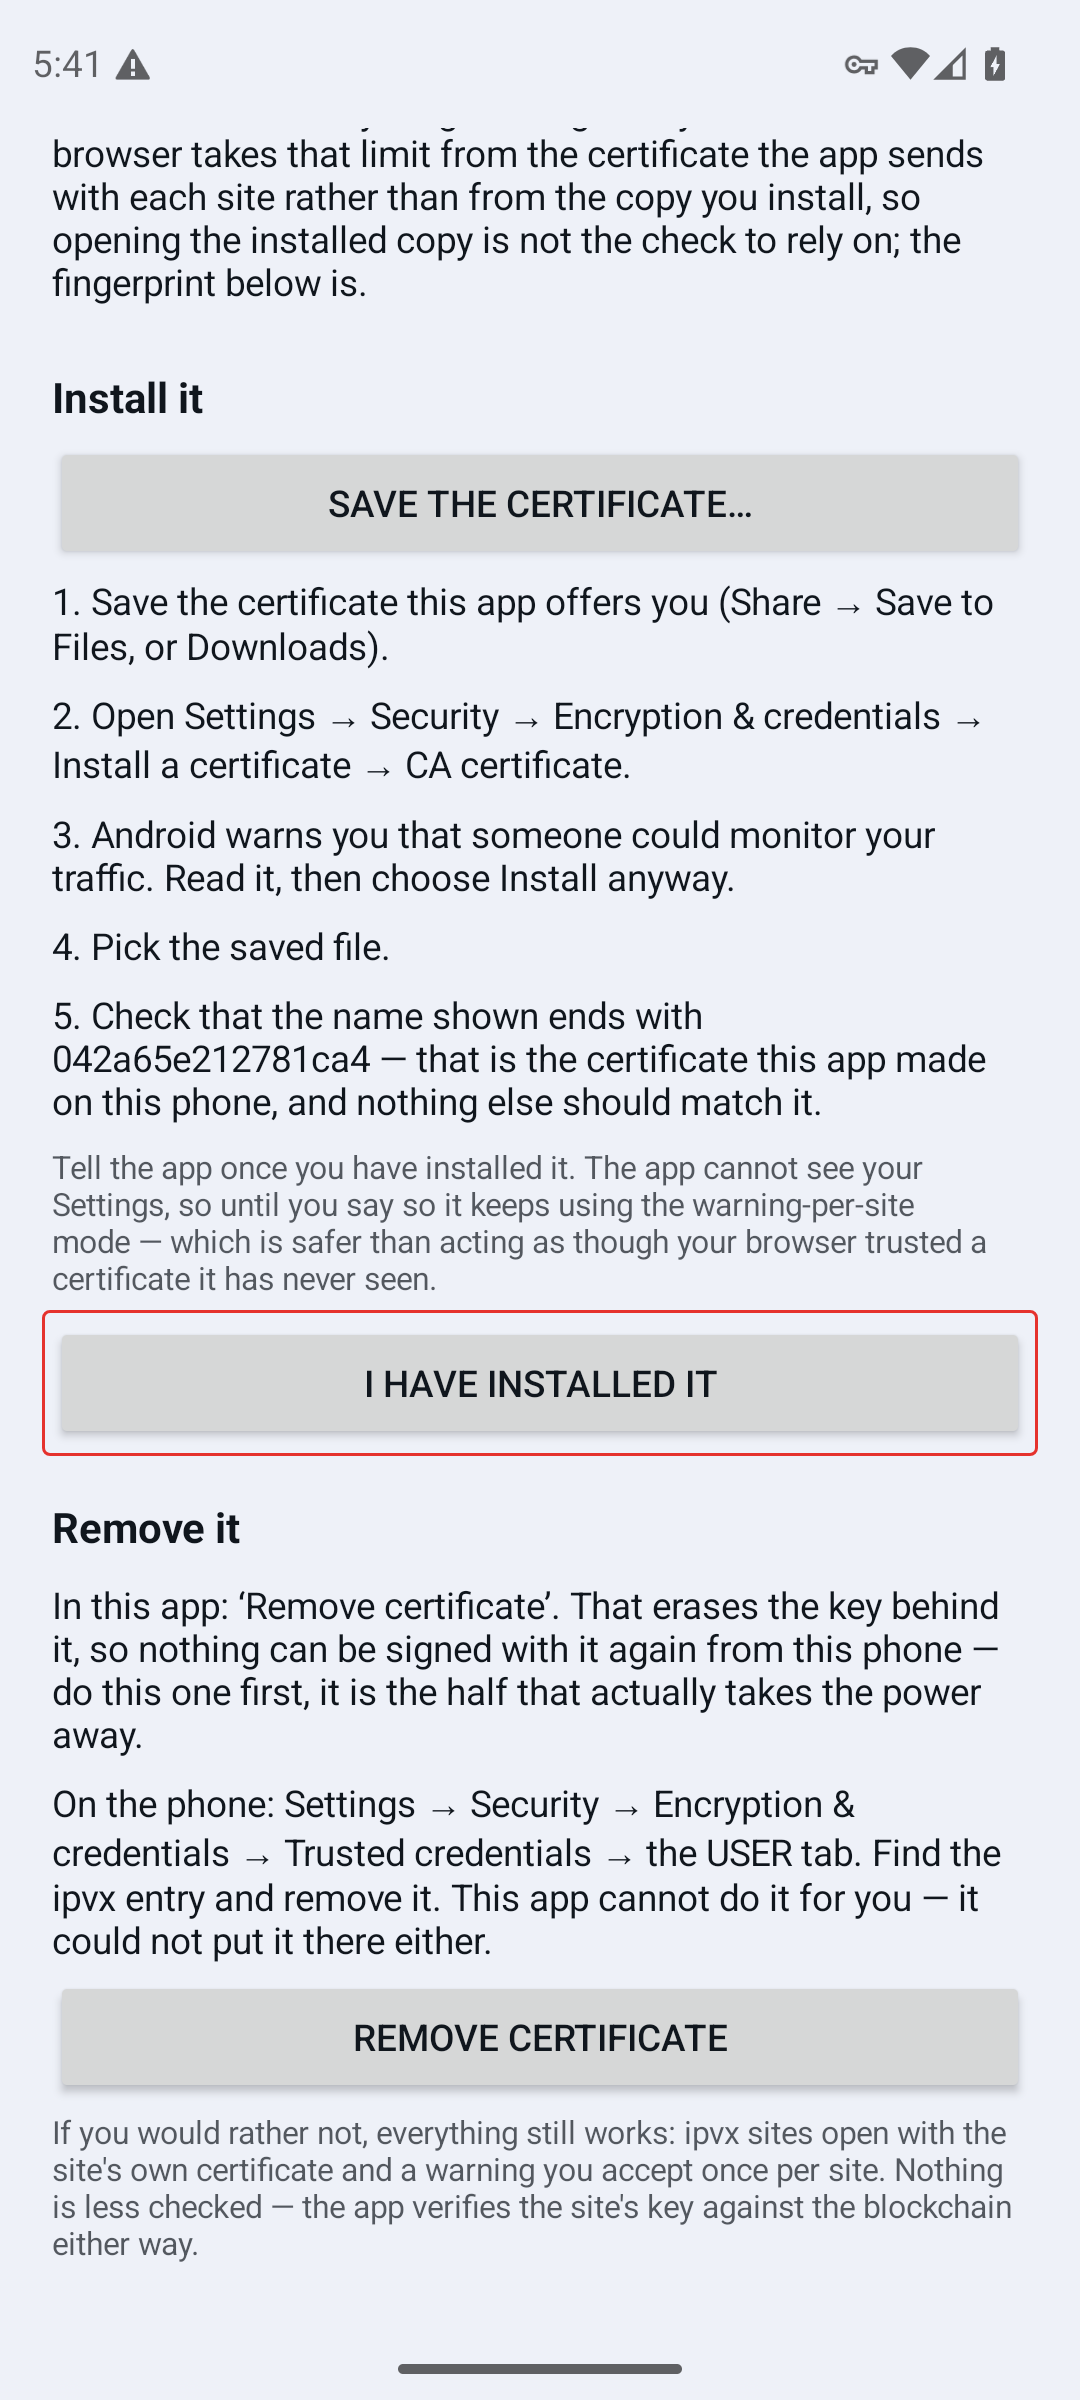
Press I have installed it. The state line becomes trusted mode: on.
7. Turn it on
Back on the main screen the button now offers to turn the stack on.
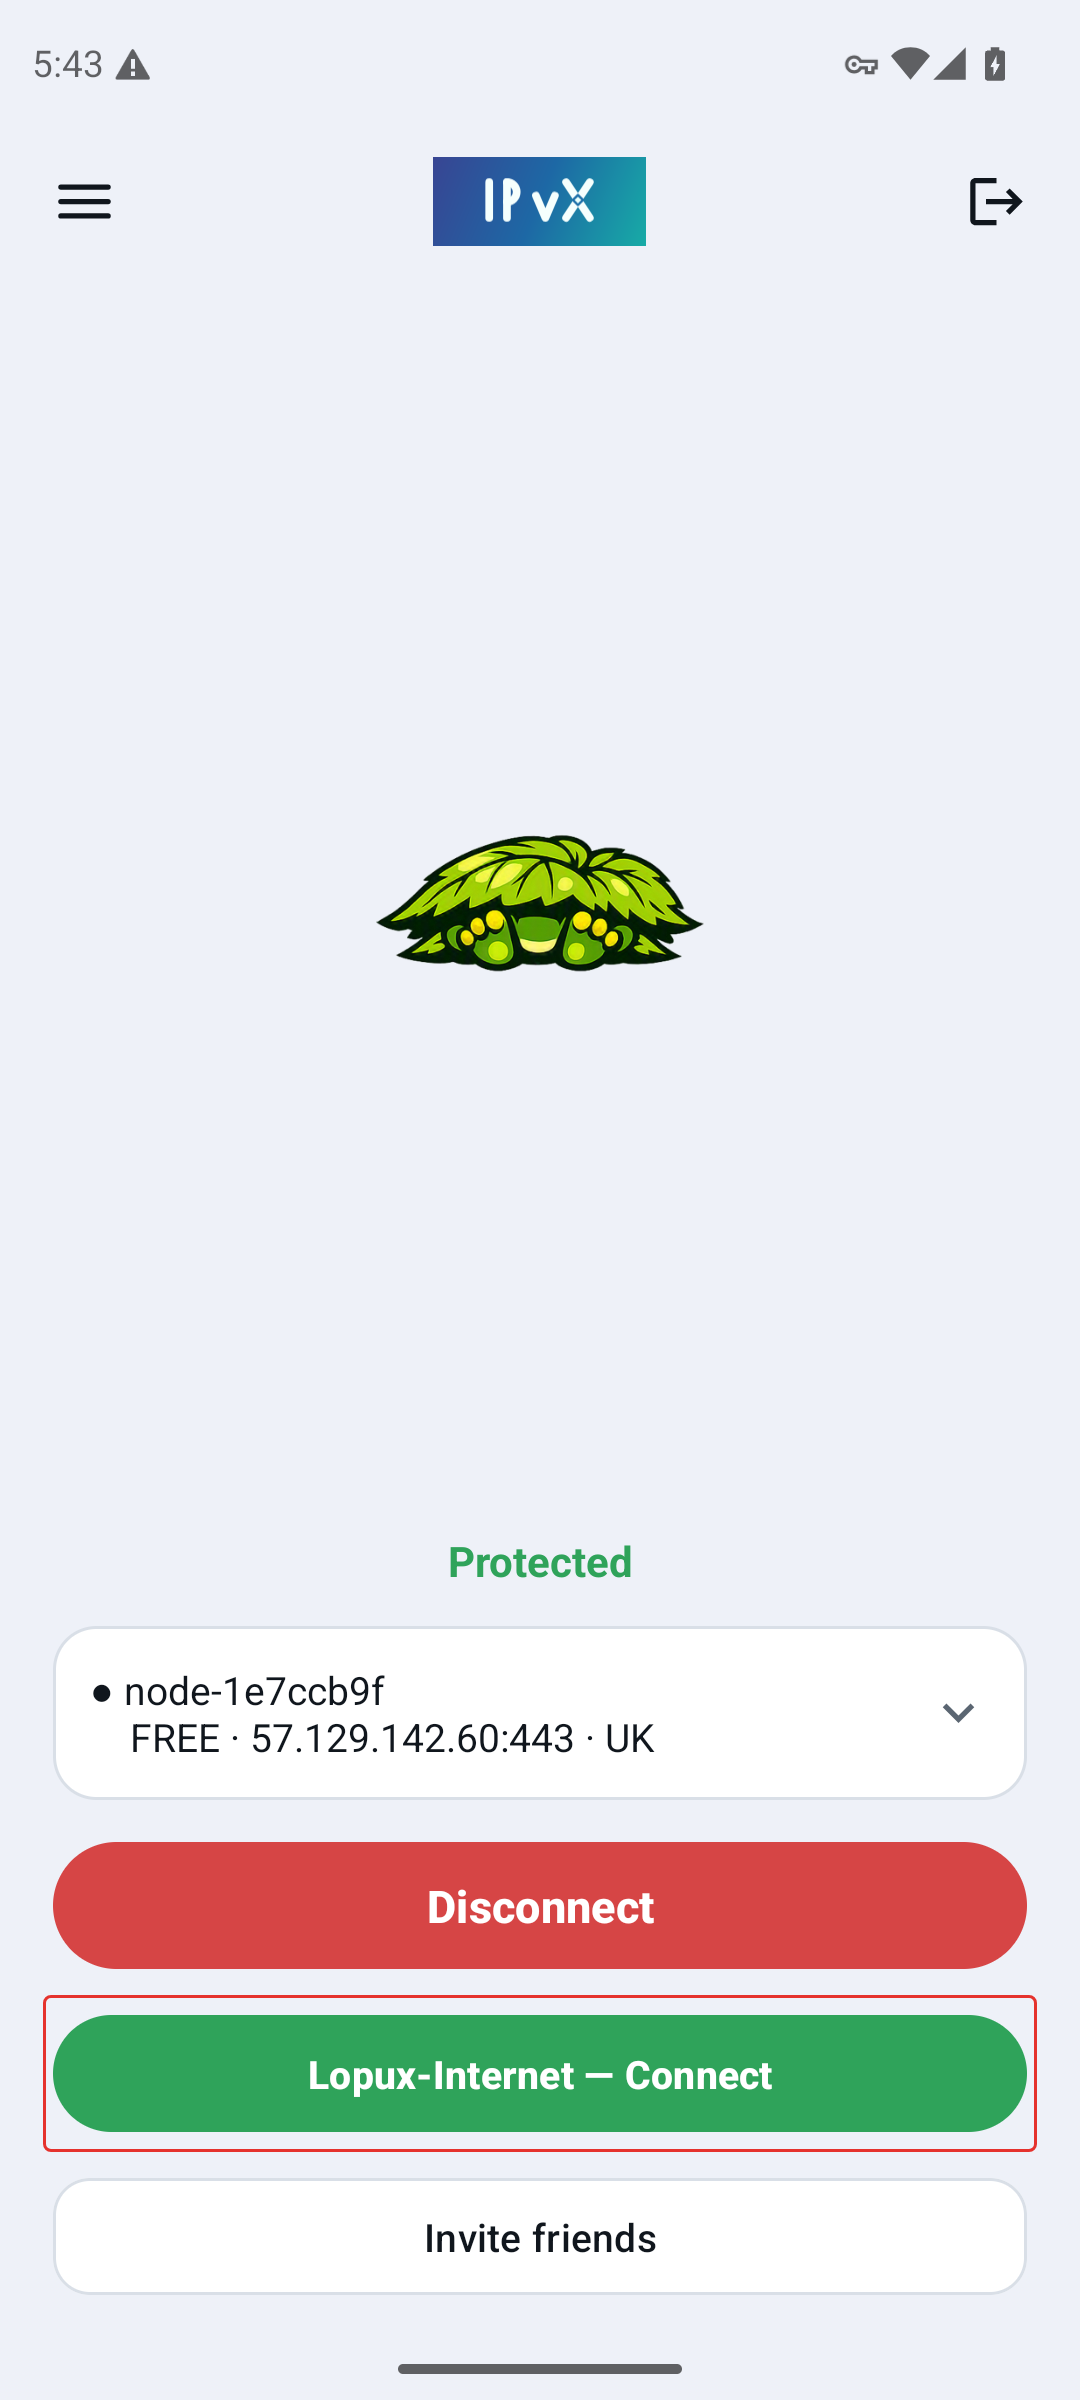
Press it. The tunnel is rebuilt — that takes a few seconds — and the same button, now red, turns it off again.
8. Open a site
Type an ipvx name in your browser. lopux.ipvx is this project's own site and a good first test.
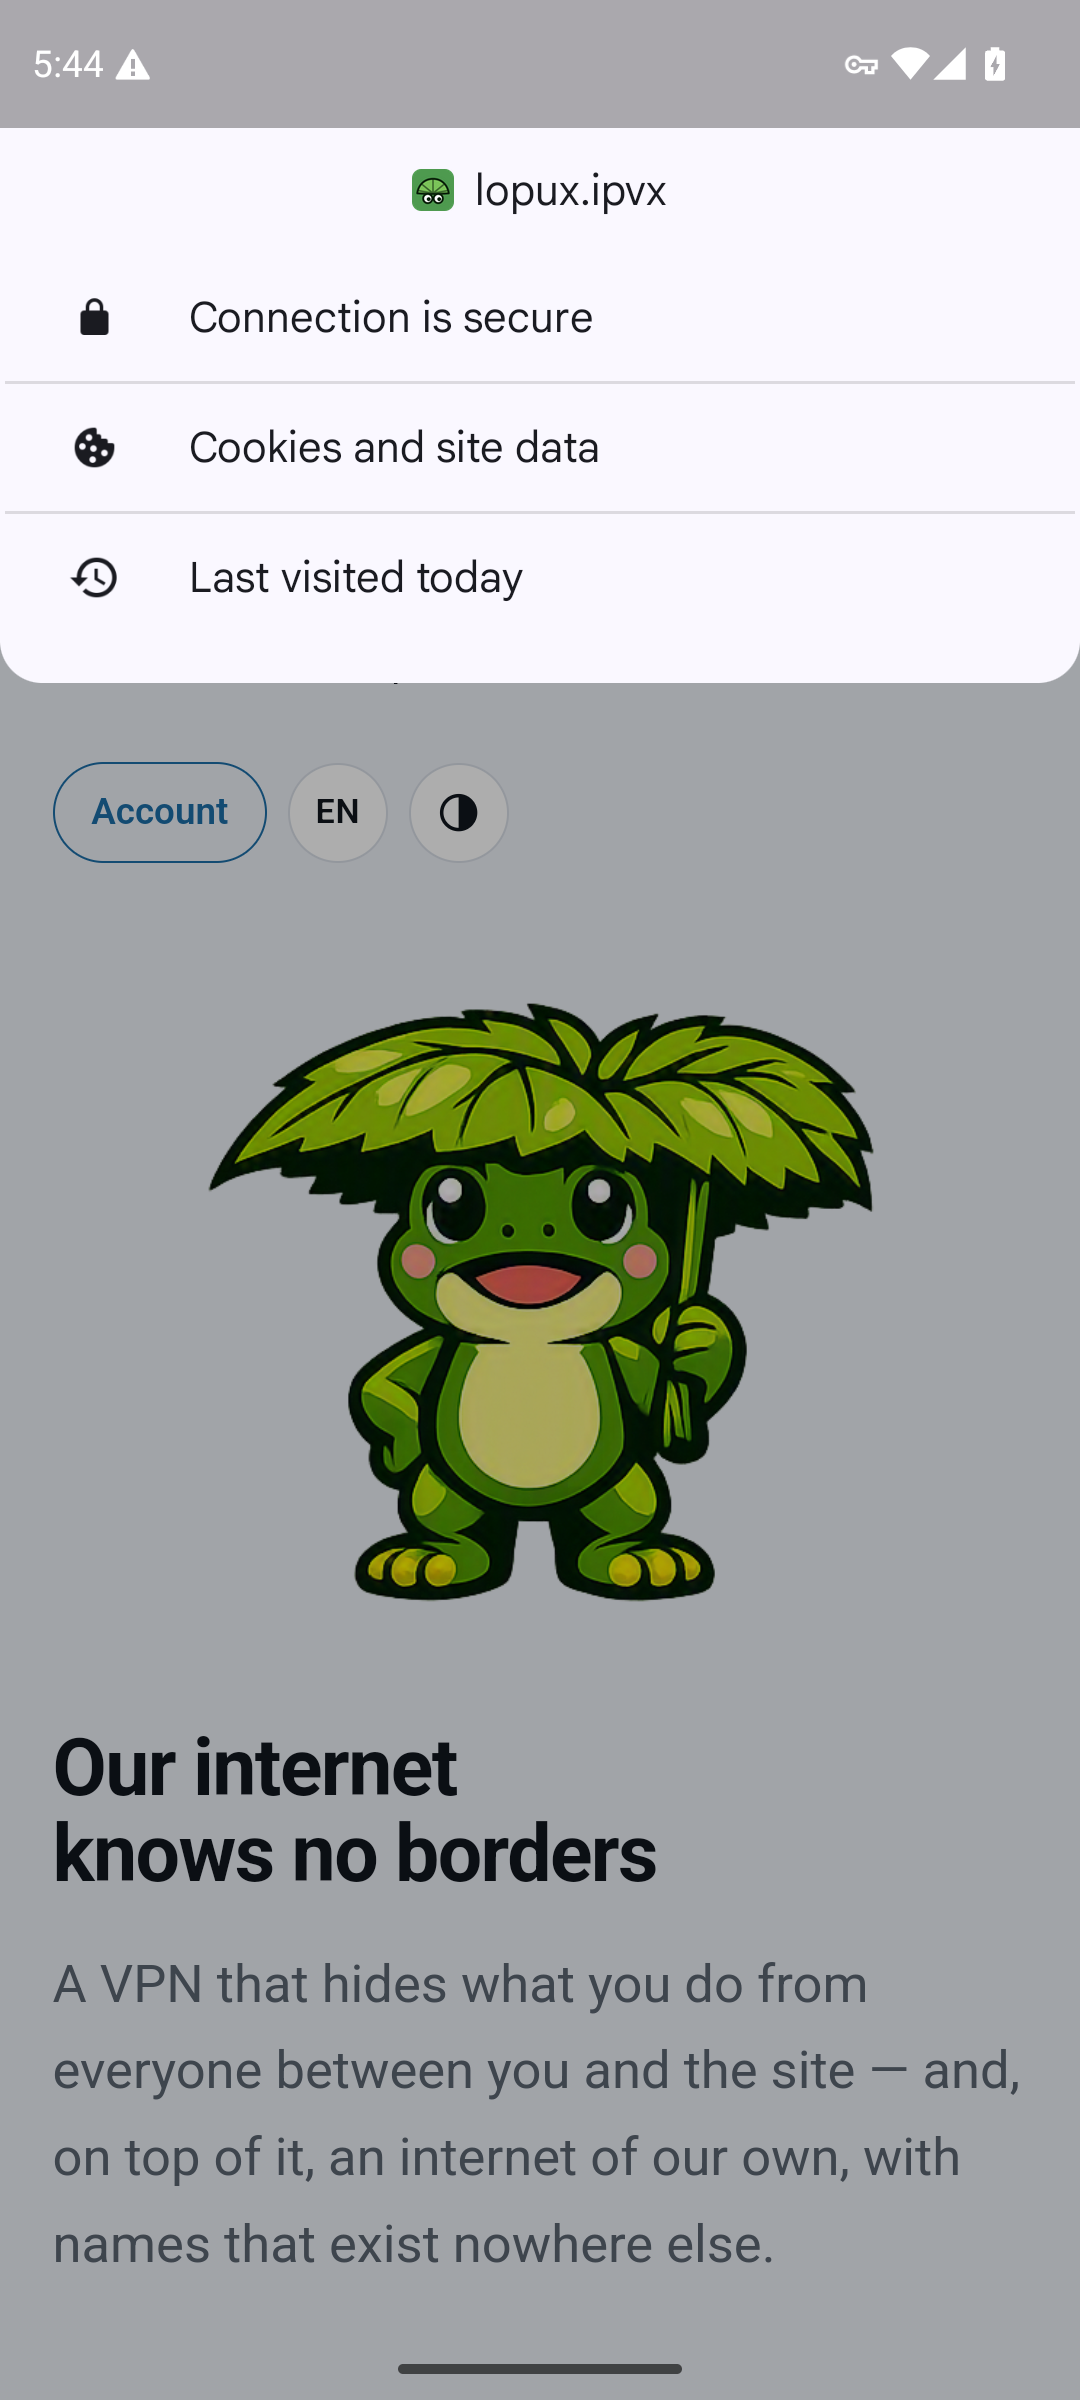
What the padlock means here — and the case that surprises people. It means your phone's own bridge is talking to your browser and the site's key matched what its owner published on-chain. But if the check fails, you still see a padlock, over an error page: the app has to complete a secure connection with your browser before it can show you anything, including bad news. Read the page, not the icon.
It also vouches for identity, not honesty: that mysite.lopux really is the machine whose owner registered that name — nothing about whether they will send you the goods.
One thing to know if you ever click through a browser warning on an ipvx site: the browser remembers that override and keeps showing the site as not secure for the rest of its run, even after everything is verified again. Closing the tab is not enough; quit the browser.
9. Turning it off, and taking the certificate back
The whole stack is one switch. Turn it off with the same button and nothing is bound, nothing is looked up, no ipvx names are handled: you have a plain VPN again.
Removing the certificate is two separate halves, and only you can do the second.
- In the app, first — the certificate screen's Remove certificate. It never asks for confirmation the way installing did: it takes something away. This erases the key behind the certificate, so nothing on this phone can sign with it again. It is the half that actually takes the power away, which is why it goes first;
- then in Android — Settings → Security & privacy → More security & privacy → Encryption & credentials → Trusted credentials → User → ipvx local root → Uninstall. The app cannot do this for you; it could not put it there either.
10. The messages you might see
The app names the failure instead of showing a blank page:
| What you are told | What happened | Whose move |
|---|---|---|
| No key fingerprint published for this name | the owner never published one, so there is nothing to check against | theirs. The app will not connect unverified |
| This is not the site it claims to be | the server offered a key that does not match the published one | do not enter anything. Either the owner changed keys without publishing, or someone is impersonating the site |
| The site did not answer | name and key are fine, the server did not respond | theirs — try later |
| This name did not resolve | no address came back for the name | theirs, or the name does not exist |
| This page cannot work over plain http | the page links to itself with full https:// addresses | the owner's to fix |
| This app needs an update to open this site | a group of names was added that your version does not know | yours — update the app |
One difference from the desktop app worth knowing: the computer can be told to read the blockchain itself instead of asking the ipvx server you are connected to. The phone has no such setting yet — it asks the server.